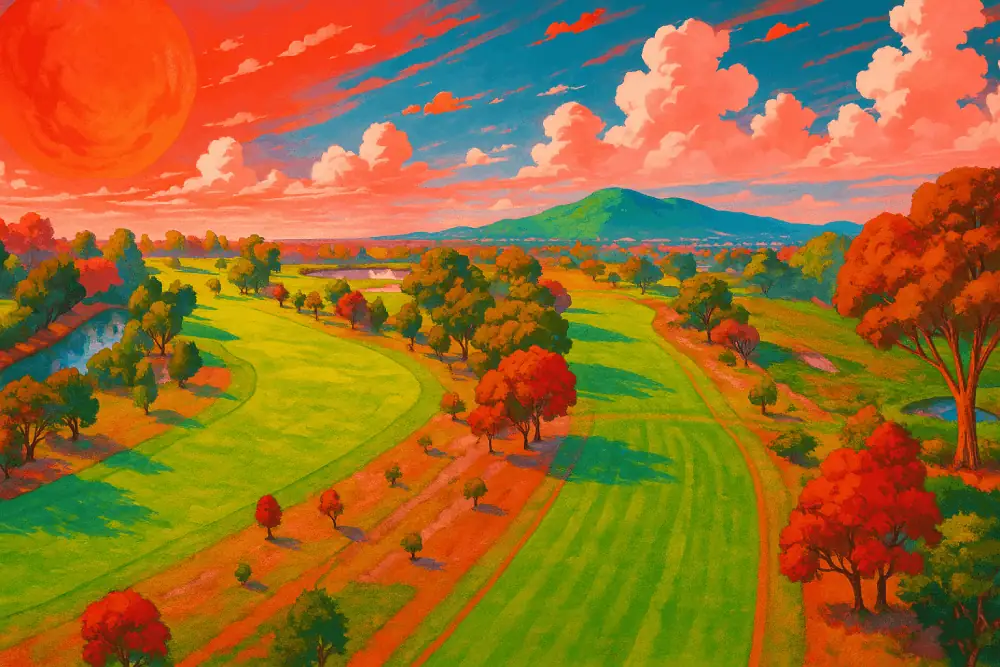
Tucked away just a short 90-minute drive from the hustle and bustle of Melbourne CBD, Buninyong Golf Course is a bit of a hidden gem that’s well worth the trek. Known for its scenic charm and strategic layout, this 18-hole wonder is where you’ll want to chuck your clubs in the boot and head out for a ripper day on the greens.
Kicking things off, Hole 1 is like a friendly handshake – a generous 475m (519y) par 5 that lets you ease into your game without throwing you in the deep end. With a stroke index of 16, it’s pretty forgiving, so you can try to find your swing without the pressure of an audience of bunkers staring you down. Then there’s Hole 2, a cheeky little 129m (141y) par 3. It might look like a walk in the park, but don’t be fooled – this hole has a bit of bite. Ranked 14th for difficulty, it’s all about precision. Miss your mark, and you might find yourself doing a bit more gardening than you’d bargained for. And just when you think you’ve got it sorted, along comes Hole 3. Stretching out to 349m (382y), this par 4 is a sly fox with a stroke index of 2, demanding a bit of noggin use. The fairway might beckon invitingly, but a sneaky dogleg and a green with more twists than a mystery novel mean you’ll need to keep your wits about you.
With its blend of long par 5s, tricky par 3s, and strategic par 4s, Buninyong isn’t just about whacking the ball and hoping for the best. It’s about enjoying the views, planning your attack, and maybe having a laugh when things don’t go quite as planned. Whether you’re a seasoned pro or just looking for a great day out, Buninyong promises a fair dinkum golfing experience.
So, why not come on down and give it a burl? You might just find it’s your new favourite spot to tee off.
Location: 613 Learmonth Street, Buninyong, VIC, Australia
Website: www.buninyonggolfclub.com.au
Phone: +61 (03) 5341 8051
Tee Boxes
| Tee | Yardage | Course Rating | Slope |
|---|---|---|---|
| White | 5759 | 71 | 128 |
Hole by Hole Breakdown
Buninyong Hole 1 – Par 5
Index: 16
Lengths: White: 475 metres
Kick off your round with a gentle nudge rather than a hard shove on Hole 1, a laid-back par 5 stretching a comfortable 475 metres (519 yards). With a stroke index of 16, it’s one of the more forgiving holes at the club, offering a chance to ease into your game without too much distress. The absence of significant hazards like bunkers or water means your main challenge here is to keep it straight and true off the tee. The fairway is broad-shouldered and welcoming, much like the mate who always forgives your late arrival at the BBQ. The green is straightforward, no tricky slopes or severe breaks, just a clean putt for a satisfying start. Perfect for warming up and finding your rhythm, this hole sets a relaxed tone for the day — just what you need before the course starts to bare its teeth.
Buninyong Hole 2 – Par 3
Index: 14
Lengths: White: 129 metres
Ah, Hole 2 – she’s a wee beauty, isn’t she? Just a short jaunt at 129m (141y) from the white tees, but don’t let her modest length fool you. This par 3 might look like a breather on the card – ranked 14th for difficulty – yet, there’s always a twist in the tale. It’s all about precision here; no mucking about with fancy tricks. The green, subtle yet slick, can make or break your par dreams. It’s a straightforward pitch, but don’t underestimate the need for accuracy; a wayward shot could easily dance off the green, leaving you scrambling. So, choose your club wisely, aim true, and maybe, just maybe, you’ll walk off with a birdie to brag about. Just the right blend of challenge and charm to keep things interesting early in the round.
Buninyong Hole 3 – Par 4
Index: 2
Lengths: White: 349 metres
Ah, Hole 3, a par 4 stretching 349 metres (382 yards), is a true test of your golfing mettle, earning its stroke index of 2. Don’t let the lack of obvious landmarks fool you; it’s the subtleties here that catch you off-guard. The fairway seems welcoming enough, but positioning is key. A slight dogleg requires a thoughtful tee shot; too bold and you’re flirting with the rough, too timid and you’re setting up a longer, trickier approach. The green, deceptively simple-looking, has contours that could humble a seasoned pro. This hole doesn’t scream danger like others might, but underestimate it at your peril. It’s a thinker’s hole, where strategy and precision win the day. So, choose your shots wisely and maybe, just maybe, you’ll come out on top.
Buninyong Hole 4 – Par 4
Index: 3
Lengths: White: 308 metres
Ah, Hole 4, she’s a sneaky one. Listed at a modest 308 metres (337 yards) from the whites, don’t let the yardage fool you; this par 4 packs a punch and is ranked a solid stroke index 3 for a reason. The challenge here isn’t about length; it’s all about precision and strategy. With no significant landmarks to distract, the hole demands a keen eye and a steady hand off the tee. The fairway, while generous, has a subtle undulation that can leave you with an awkward lie if you’re not careful. Approach shots require a bit of finesse — get too bold and you might find yourself chipping back onto the green rather than putting for birdie. It’s a hole where par feels like a small victory and birdies are whispered about like urban legends. Perfect for a bit of drama as the round starts to heat up!
Buninyong Hole 5 – Par 4
Index: 5
Lengths: White: 363 metres
Ah, Hole 5, a classic par 4, measuring a tidy 363 metres (397 yards). Don’t let the lack of flashy points of interest fool you; what this hole lacks in spectacle, it more than makes up for in its strategic demands. Ranked with a stroke index of 5, it’s definitely not a walk in the park. The key here is precision off the tee — overshoot your drive and you might just find yourself grappling with a longer approach than you bargained for, thanks to a slyly sloping fairway that can catch even the seasoned golfer off guard. It’s all about positioning for that second shot, aiming to land on a green that’s more guarded than the crown jewels. So, plan your shots, keep it tight, and maybe, just maybe, you’ll walk off with a smile. Or at least with fewer grey hairs!
Buninyong Hole 6 – Par 5
Index: 12
Lengths: White: 441 metres
Ah, Hole 6, the sleeper of the course. Stretching a solid 441 metres (482 yards) from the white tees, this par 5 might lull you into a false sense of security with its Stroke Index of 12. Don’t be fooled though; it’s a strategic masterpiece that requires a bit of cunning to play well. The fairway here is as straightforward as they come, no tricks up its sleeve, but the true game begins on your approach. The green is more protected than the crown jewels, making precision key to landing close to the pin. It’s a hole where eagles dare but often settle for birdie or par, testing both your power and finesse in equal measure. Ideal for a golfer looking to stretch their legs and their strategy muscles a bit.
Buninyong Hole 7 – Par 4
Index: 9
Lengths: White: 354 metres
Here we are at Hole 7, a par 4 that’s as crafty as a street-wise fox. Stretching 354 metres (387 yards) from the white tees, it’s ranked with a stroke index of 9, so it’s right in the middle of the pack difficulty-wise — not too cruel, not too kind. What makes this hole a real chin-scratcher is how it plays. There’s no flashy water hazards or deep bunkers to wrestle with, but don’t let its bare-bones appearance fool you. The real game here is all about positioning and precision off the tee. Nail that, and you’re setting yourself up for a sweet approach. Miss it, and you’ll be dancing around trying to salvage par like a cat on a hot tin roof. It’s a classic test of golf, where strategy and skill are your best mates.
Buninyong Hole 8 – Par 3
Index: 11
Lengths: White: 183 metres
Hole 8, a par 3 stretching 183 metres (200 yards) from the white tees, is a subtle test of precision and nerve. With a stroke index of 11, it might not look threatening on the scorecard, but it demands a thoughtful approach. The hole’s charm lies in its straightforwardness — no fancy tricks, just you and the green. Its simplicity is its challenge, making golfers underestimate its demand for accuracy. The lack of significant landmarks or hazards lets the natural contours of the green take centre stage, coaxing players into a strategic game of land-and-hold. It’s the kind of hole that whispers rather than roars, yet still manages to shake the confidence of those who dare take it lightly. Ideal for a bit of quiet competition among mates, it’s a deceptive breather that might just impact the scorecards more than expected.
Buninyong Hole 9 – Par 5
Index: 7
Lengths: White: 474 metres
Hole 9 is where you’ll find out if your swing’s been tuned or if it’s still asleep at the wheel. This Par 5 stretches a solid 474 metres (518 yards) and, sitting cosily at a Stroke Index of 7, it’s no walk in the park. The layout here is straightforward with no flashy tricks up its sleeve, but don’t let that fool you. It demands a strategic approach with a well-planned series of shots to make par. There’s ample opportunity to let the big dog eat off the tee, but it’s the approach that will test your mettle. With the green guarded subtly by the lay of the land rather than harsh features, picking the right club becomes a puzzle. It’s a genuine test of both power and finesse, and nailing this hole might just set the tone for the back nine. So, steady your nerves and trust your swing—this hole is a clear case of easier said than done.
Buninyong Hole 10 – Par 4
Index: 4
Lengths: White: 302 metres
Ah, Hole 10 at our beloved course — a neat little par 4 stretching a tidy 302 metres (330 yards). Don’t let the modest distance fool you; with a stroke index of 4, this one’s more clever than it looks. There’s no flashy water or treacherous doglegs to speak of, but the true test here is all about precision and strategy. The fairway is a straight shooter, but it’s flanked by a handful of strategically placed bunkers ready to punish any wayward drives. And the green? Subtly contoured, it demands a keen eye and a steady hand with the putter. This hole might not have the bells and whistles, but it’s a solid test of golf that can make or break the back nine. Play it smart, and you might just start the inward half with a spring in your step.
Buninyong Hole 11 – Par 4
Index: 10
Lengths: White: 343 metres
Ah, Hole 11, a tidy par 4 that stretches 343 metres (375 yards) from the white tees. With a stroke index of 10, it’s neither the toughest test on the course nor a walk in the park. The beauty of this hole lies in its straightforwardness—no frills, just a good honest golf hole. The fairway is generous enough to forgive a slightly errant tee shot, but it’s the approach that requires a bit of nous. The absence of dramatic features like bunkers or water hazards means your focus is purely on nailing that second shot to a green that’s more receptive than a mate’s invite for a Friday arvo barbie. It’s the kind of hole where strategy trumps brute force, making it a sneaky challenge that could make or break a good round. Play it smart, and you’ll stroll off feeling like a champ.
Buninyong Hole 12 – Par 3
Index: 18
Lengths: White: 112 metres
Ah, Hole 12, she’s a gem for those looking to recover their round, or simply keep a steady hand on the tiller. Stretching a modest 112 metres (122 yards) from the white tees, this Par 3 is the course’s breather, ranked easiest with a Stroke Index of 18. Don’t expect any flashy theatrics here; what you see is what you get. The absence of sand traps or water hazards means your main game is a straight shot to the green, making it a prime spot for birdies if your iron play is on point. It’s a straightforward test – no curveballs, no hidden tricks. Just you, the tee, and the green waiting patiently beneath the wide-open sky. Perfect for a bit of a chinwag with your mates as you take your shot, with hopefully not too much to lament when you recap at the 19th hole.
Buninyong Hole 13 – Par 4
Index: 13
Lengths: White: 267 metres
Ah, Hole 13, a cunning little Par 4, sitting pretty at 267m (292y), and don’t let the Stroke Index of 13 fool you—it’s a sly one. While it may not boast the usual frills—no treacherous water hazards or knee-high rough—this hole is all about strategic play. The straightforward layout encourages a bold drive, but savvy players will focus on placement over power to set up a favourable approach. It’s a bit of a breather compared to some of its monstrous brethren, yet it offers just enough challenge to keep you on your toes. Ideal for a bit of a rally if the front nine had you in the rough, Hole 13 is a subtle test of precision and planning. Make your shots count here, and you might just regain some lost ground before tackling the final stretch.
Buninyong Hole 14 – Par 4
Index: 6
Lengths: White: 344 metres
Hole 14 at the course is a deceptive little number, a par 4 stretching 344 metres (376 yards) that might lure you into thinking it’s a breather. But don’t let that fool you; with a stroke index of 6, it’s tougher than it looks. The layout demands strategic play right from the tee shot. There’s no room for heroics here unless you fancy a chat with the trees lining the fairway or the subtle undulations that can make your ball do a bit of a dance before settling. The approach to the green is all about precision, needing a well-judged iron to land softly and avoid a tricky putt. It’s a hole that might not boast dramatic features, but it certainly keeps you on your toes, making it a solid test of golfing wit and nerve.
Buninyong Hole 15 – Par 5
Index: 17
Lengths: White: 440 metres
Ah, Hole 15, the deceptive beast of the course, clocking in at a tidy 440 metres (481 yards) from the white tees. This Par 5 lures you in with a stroke index of 17, suggesting a gentle stroll in the park, but don’t be fooled. The real character of this hole is revealed at the midpoint where a cunning dogleg demands precision over power. The bend isn’t just a slight curve; it’s a sharp jab to the right, testing your ability to strategize rather than just swing. This is where you’ll want to hold back the horses and play smart—overcook it here, and you’re fishing your ball out of the rough. It’s not laden with devilish bunkers or water hazards, but don’t let the apparent openness fool you; placement is paramount to setting up a decent shot at birdie. Get it right, and you’ll have a crack at glory; get it wrong, and you’re telling tales of what could have been.
Buninyong Hole 16 – Par 4
Index: 1
Lengths: White: 378 metres
Hole 16 is where the real test kicks in, mate. A par 4 stretching 378 metres (414 yards), it’s ranked the toughest on the course for good reason. Don’t let the lack of fancy landmarks fool you — this hole is all about strategic mastery and raw nerve. The fairway is a narrow gauntlet, flanked by subtle undulations that can turn a decent shot naughty. It’s a brute that demands precision off the tee and a steady approach, or you’ll find yourself wrestling for par. The green, well, it’s no less of a challenge, guarded by a couple of sly bunkers that have trapped more balls than a backyard cricket match. So, take a deep breath, pick your line, and trust your swing. Pull this one off, and you’ll have some serious bragging rights back at the clubhouse.
Buninyong Hole 17 – Par 3
Index: 15
Lengths: White: 155 metres
Hole 17 at our course is a par-3 designed to give your scorecard a bit of relief before the final challenge. Stretching 155 metres (170 yards) from the white tees, it’s a straightforward shot with a gentle breeze often backing you up. With a stroke index of 15, it’s one of the easier holes here, giving players a chance to really shine or snatch back a shot or two lost on previous brutes. There’s nothing tricky hiding up its sleeves—no water, no sneaky bunkers; just a clean, open green that rewards a well-aimed tee shot. It’s the sort of hole where you’ll want to pause and appreciate a smooth swing and a solid impact. After all, it’s not just about the challenge here; it’s about enjoying the game.
Buninyong Hole 18 – Par 4
Index: 8
Lengths: White: 342 metres
Hole 18, a par 4 stretching a neat 342m (374y), wraps up the round with a bit of cheeky challenge, ranked 8 on the stroke index. This hole doesn’t mess about with unnecessary frills; no water hazards to dunk your balls, and not a bunker in sight that’s gossiping about your sand skills. Instead, it’s all about the clean lines and strategic play. The fairway is a straightforward dash to the green, but don’t be fooled—precision is key. Overzealous drives could find you flirting with the rough, making for a tricky approach. It’s a classic finisher that doesn’t wear you out but keeps you on your toes, testing your accuracy when the pressure’s on to close with a smart score. Ideal for a final flourish, or to redeem a round that’s seen better days.
Course Stats Summary
- Holes: 18
- Total Par: 72
- Longest Hole: 475 metres
- Shortest Hole: 112 metres