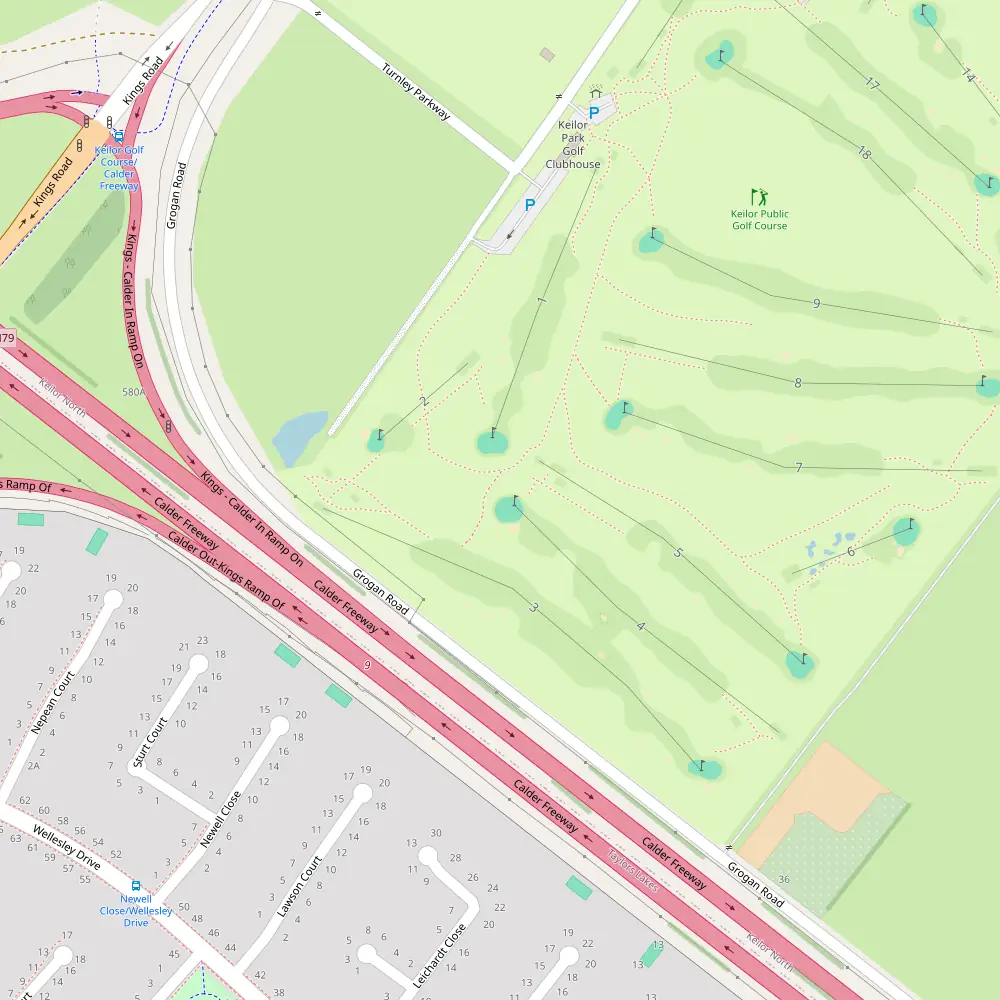
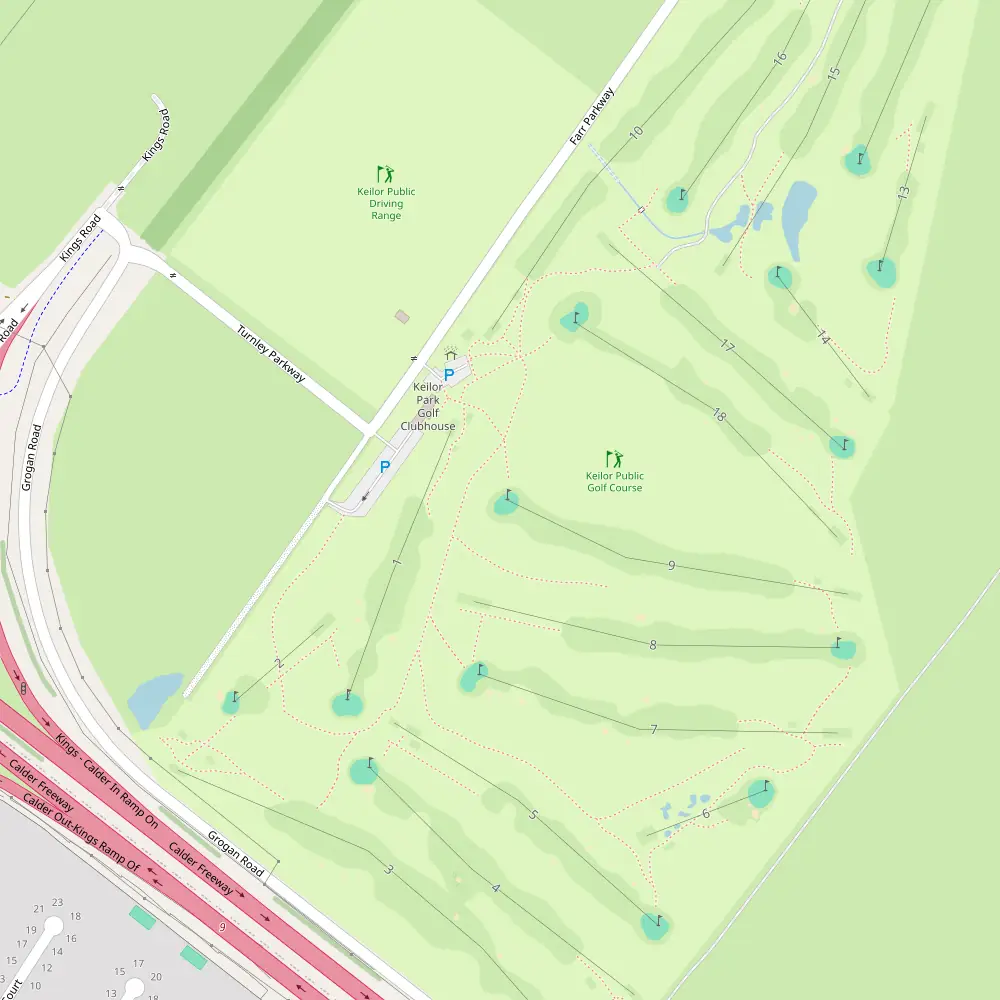
Just 40 minutes from Melbourne CBD, Keilor North plays host to one of the western suburbs’ best-kept secrets—Keilor Public Golf Course. It’s not just about smashing the little white ball here; it’s about navigating clever course design, soaking up the local scenery, and, let’s be honest, probably losing a ball or two in the process.
With 18 holes and multiple tee options—White, Yellow, Blue, and Red—Keilor caters to every kind of golfer, from scratch players to weekend hackers. It’s a course that balances fun and frustration in just the right measure, with a layout full of subtle traps and cheeky surprises.
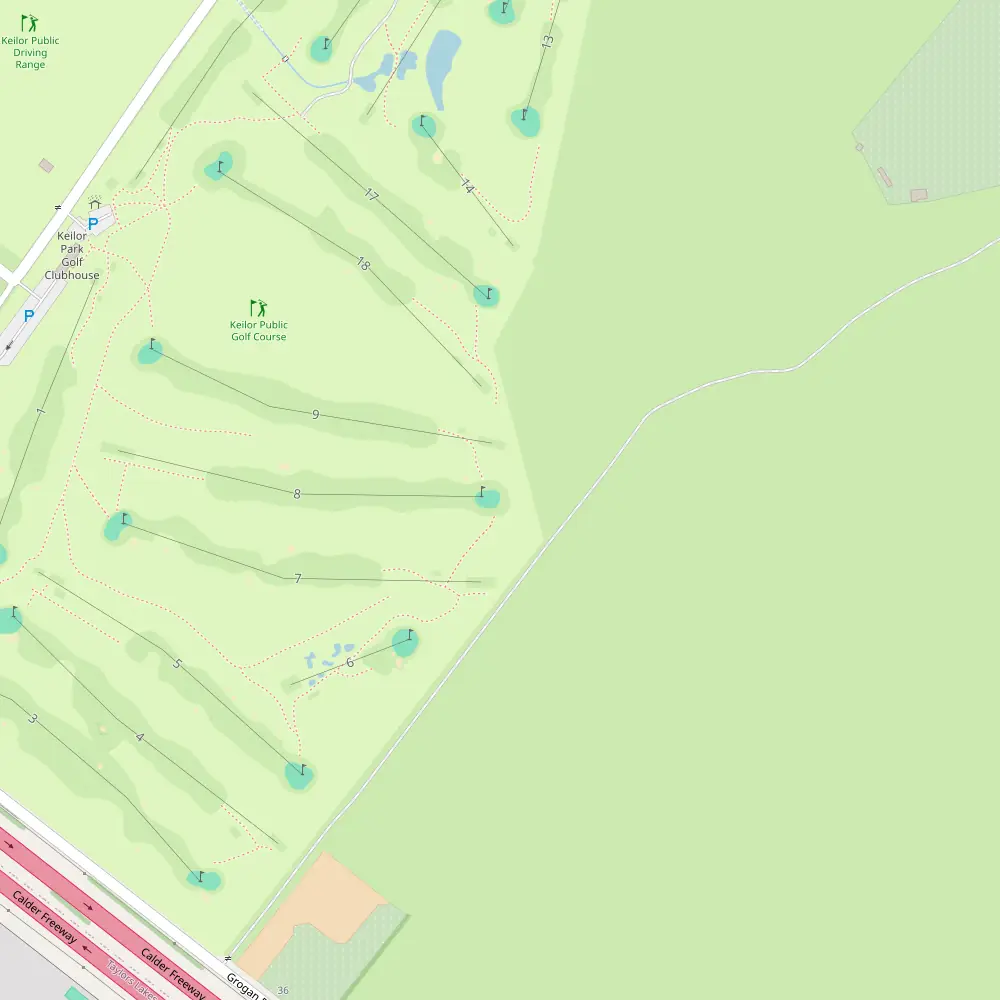
Take Hole 1 for example: a friendly Par 4 stretching 290 metres (317 yards) from the White and Blue tees. It’s a gentle handshake to get you going—nothing too nasty, just enough to warm up the swing and settle into the round. Then comes Hole 2, a short Par 3 at 145m (159y), which looks harmless until you’re standing over the ball, suddenly questioning every club in your bag.
And then there’s Hole 3—a meaty Par 5 measuring 451m (493y). It’s a straight shooter on paper, but a few misjudged swings can quickly turn it into a grind. The hole rewards those who go big with the driver but still keeps things honest with clever positioning and a green that’s just tricky enough to mess with your confidence.
The rest of the course brings plenty of elevation changes, a few pop-up water hazards, and some tree-lined fairways that are as punishing as they are pretty. Add in a few postcard-worthy views and you’ve got yourself a round that’s as scenic as it is satisfying.
Whether you’re chasing a PB or just out for a laugh with your mates, Keilor Public Golf Course delivers a fair dinkum good time. It’s honest golf, in a cracking setting, and well worth a visit next time you’re up for a hit.
Location: Calder Highway, Keilor North, VIC, Australia
Website: http://www.keilorgolf.com.au/
Phone: +61 (03) 9390 1538
Tee Boxes
| Tee | Yardage | Course Rating | Slope |
|---|---|---|---|
| White | 5387 | ||
| Yellow | 0 | ||
| Blue | 5387 | ||
| Red | 4761 |
Hole by Hole Breakdown
Keilor Public Golf Course Hole 1 – Par 4
Index: 11
Lengths: White: 290 metres, Yellow: 0 metres, Blue: 290 metres, Red: 258 metres
Ah, Hole 1 — she’s a straightforward Par 4, stretching 290 metres (317 yards) from both the White and Blue tees, while the Red tees offer a slightly gentler 258 metres (282 yards). With a Stroke Index of 11, this opener is more of a gentle handshake than a tough arm wrestle. It’s the type of hole where strategy trumps strength, inviting a smart tee shot to set up a clean, unobstructed approach. No significant doglegs or cheeky water hazards to ruin your card early on, just a clean drive and a solid iron should see you off to a promising start. Ideal for shaking off those first-tee jitters and finding your rhythm without too much drama. Let’s just say, it’s like the calm before the storm in this round.
Keilor Public Golf Course Hole 2 – Par 3

Index: 18
Lengths: White: 145 metres, Yellow: 0 metres, Blue: 145 metres, Red: 125 metres
Hole 2, a cheeky little par 3, might deceive you with its stroke index of 18, suggesting it’s the easiest on the course. But don’t let your guard down just yet. Stretching a modest 145 metres (159 yards) from both the White and Blue tees, and a slightly shorter 125 metres (137 yards) from the Red, this hole demands a precise tee shot. The absence of major hazards gives a clean line of sight to the green, which, mind you, isn’t as forgiving as it appears. The real challenge lies in mastering the subtle undulations of the green, which can turn a sure birdie into a scrambling par or worse. Ideal for a bit of a breather, yet it keeps you on your toes — a true test of finesse and control.
Keilor Public Golf Course Hole 3 – Par 5
Index: 9
Lengths: White: 451 metres, Yellow: 0 metres, Blue: 451 metres, Red: 416 metres
Ah, Hole 3, a sturdy par 5 that stretches a respectable 451m (493y) from both the white and blue tees, with the red tees offering a slightly gentler 416m (455y). Ranked 9 on the stroke index, this hole isn’t the toughest on the course, but it’s no walk in the park either. What makes it intriguing is the strategic play it demands. Without any major landmarks or tricky features to distract, it’s all about how you handle your club and manage the fairway. The layout is straightforward, yet it requires a solid tee shot followed by a series of calculated approaches to reach the green in regulation. Perfect for those looking to test their pure golfing skills, without any gimmicky obstacles. It might not have the flair of other holes, but underestimate it at your peril—overconfidence here can cost you more strokes than you might expect.
Keilor Public Golf Course Hole 4 – Par 4
Index: 5
Lengths: White: 327 metres, Yellow: 0 metres, Blue: 327 metres, Red: 285 metres
Ah, Hole 4, a solid Par 4 that doesn’t mess about. Stretching 327 metres (358 yards) from both the white and blue tees, and a slightly more forgiving 285 metres (312 yards) from the red, this hole is a straightforward test of your mid-game mettle. With a stroke index of 5, it’s one of the tougher challenges on the front nine, demanding precision over power. There aren’t any fancy water hazards or sneaky bunkers to ruin your day, but don’t let the lack of visual threats lull you into a false sense of security. The real game here is about placement and strategy. Land your drive well, and you’re setting up for a birdie chance. But get too casual with your approach, and you’ll find the subtle undulations of the green can turn a sure thing into a slippery two-putt par. It’s classic golf at its understated best.
Keilor Public Golf Course Hole 5 – Par 4
Index: 13
Lengths: White: 311 metres, Yellow: 0 metres, Blue: 311 metres, Red: 285 metres
Ah, Hole 5 — a cheeky Par 4 where you can really let the big dog eat. Running 311 metres (340 yards) from both the White and Blue tees, and a slightly more forgiving 285 metres (312 yards) from the Red, this hole might seem straightforward, but don’t be fooled by its modest Stroke Index of 13. With no major landmarks or tricky water hazards to disrupt your play, it’s all about the purity of the game here. The fairway is generous enough to forgive a less-than-perfect drive, yet it’s the approach that requires a sharp eye. Positioning is key; get too complacent and you might find yourself grappling with a challenging lie, making par feel suddenly out of reach. Ideal for players looking to recover from a tough front four, or simply to steady the ship with a solid par.
Keilor Public Golf Course Hole 6 – Par 3
Index: 15
Lengths: White: 124 metres, Yellow: 0 metres, Blue: 124 metres, Red: 108 metres
Ah, Hole 6, a cheeky little Par 3 that might seem like a breather at first glance, but don’t let its modest 124 metres (136 yards) from the white and blue tees fool you. For those opting for the red tees, it’s a slightly gentler 108 metres (118 yards). With a stroke index of 15, it’s one of the easier holes on the card, perfect for a bit of a respite after the challenges of the front five. The straightforward layout lacks the typical hazards—no bunkers to negotiate or water to clear—but the true test here is all about precision and choosing the right club. A well-placed tee shot can make all the difference between a satisfying birdie and a frustrating bogey. Ideal for sharpening your short game, this hole offers a good opportunity to regain some ground or, at the very least, catch your breath before tackling the more daunting challenges that lie ahead.
Keilor Public Golf Course Hole 7 – Par 4
Index: 1
Lengths: White: 366 metres, Yellow: 0 metres, Blue: 366 metres, Red: 312 metres
Ah, Hole 7, a true test of mettle and the ranked bruiser of the course with a stroke index of 1. Stretching a sturdy 366 metres (400 yards) from both the White and Blue tees, and a slightly more forgiving 312 metres (341 yards) from the Red, this par 4 doesn’t mess about. The layout’s as straightforward as a schooner slide down the bar, but don’t let that fool you into complacency. With no notable distractions like bunkers or water hazards, the real challenge lies in mastering your tee shot and navigating the subtle undulations of the fairway that can turn a good lie bad in a blink. It’s all about placement and power here, mates. Pull this off, and you’ll be the toast of the clubhouse; falter, and it’s a tale of what could have been.
Keilor Public Golf Course Hole 8 – Par 4
Index: 3
Lengths: White: 358 metres, Yellow: 0 metres, Blue: 358 metres, Red: 331 metres
Ah, Hole 8, she’s a sly one. With a par of 4 and a stroke index of 3, don’t be fooled by her seemingly straightforward stretch. At 358 metres (392 yards) from both the White and Blue tees, and a slightly more forgiving 331 metres (362 yards) from the Red, she demands a blend of brawn and brain. The key here is all in the drive; smack it too enthusiastically, and you’ll wish you’d taken a more tactical approach. Despite the absence of typical distractions like bunkers or water hazards, the challenge lies in mastering the subtle undulations of the fairway and the strategically placed trees that can turn what looks like a clear shot into a tricky recovery. So, choose your weapon wisely off the tee, and maybe, just maybe, you’ll walk off with a smile rather than a scowl.
Keilor Public Golf Course Hole 9 – Par 4
Index: 7
Lengths: White: 344 metres, Yellow: 0 metres, Blue: 344 metres, Red: 303 metres
Ah, Hole 9, a tidy par 4 at 344 metres (376 yards) from the back tees, both blue and white, while the red markers offer a slightly less daunting 303 metres (331 yards). This hole, with a stroke index of 7, isn’t one to be underestimated. It’s a straightforward challenge but demands a solid tee shot if you’re aiming to make par. The fairway is generous enough, yet it’s the approach that requires a bit of nous. Without any notable bunkers or water hazards to disrupt your play, it’s all about positioning and precision to land on the green in regulation. Ideal for a strategic golfer, this hole might not have the drama of a cliffside or a lagoon, but it packs its punch in subtlety – a real thinker’s hole. A solid finish here sets the tone for a strong back nine, so choose your clubs wisely and keep your wits about you.
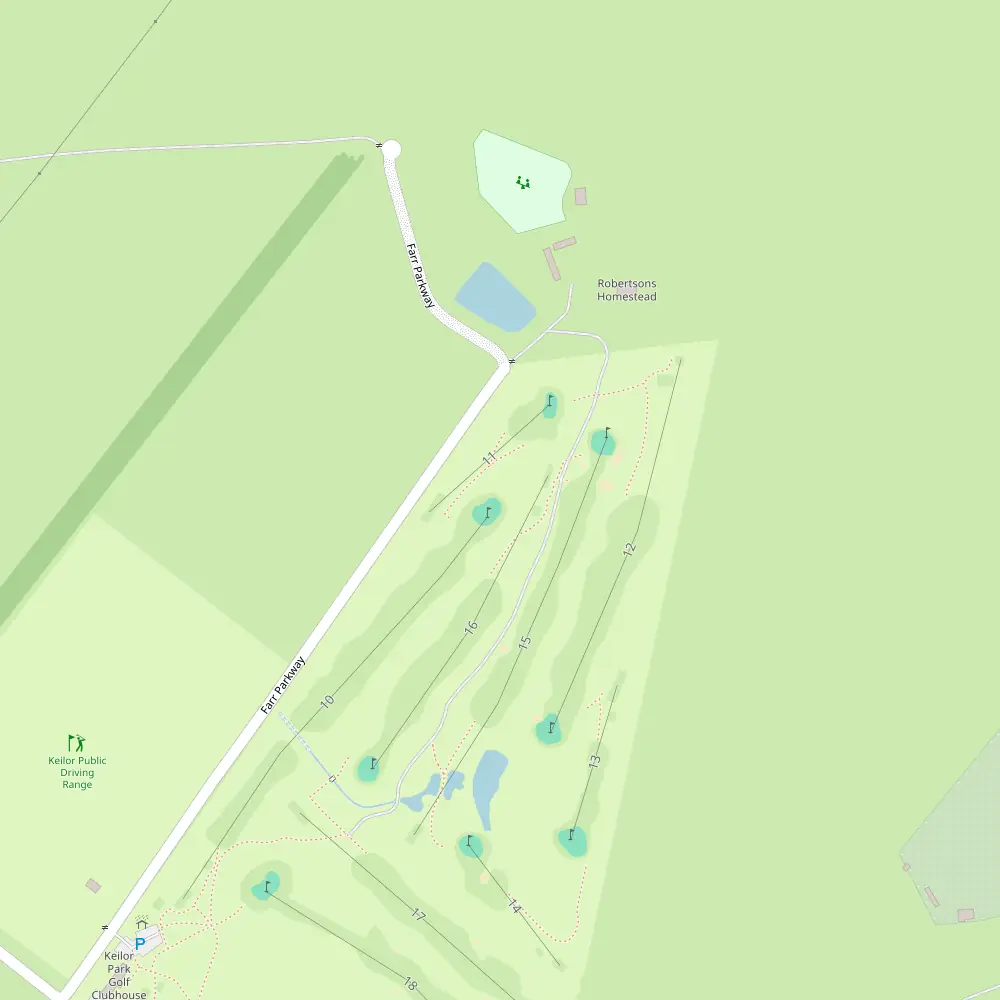
Keilor Public Golf Course Hole 10 – Par 5
Index: 2
Lengths: White: 473 metres, Yellow: 0 metres, Blue: 473 metres, Red: 416 metres
Ah, Hole 10, a true test of mettle and strategy for any golfer daring enough to tackle it. Stretching a solid 473 metres (517 yards) from the white and blue tees, and a slightly more forgiving 416 metres (455 yards) from the red, this par 5 beast boasts a stroke index of 2, making it one of the most challenging on the course. At the heart of this hole lies a cunning water hazard, strategically placed to catch any overly ambitious drives or careless second shots. The key here is precision over power — overshoot your mark, and you’ll find yourself fishing more than playing. With no room for error and the water ever-looming, Hole 10 offers a thrilling blend of risk and reward that can make or break your back nine. Play it smart, and you might just conquer this brute.
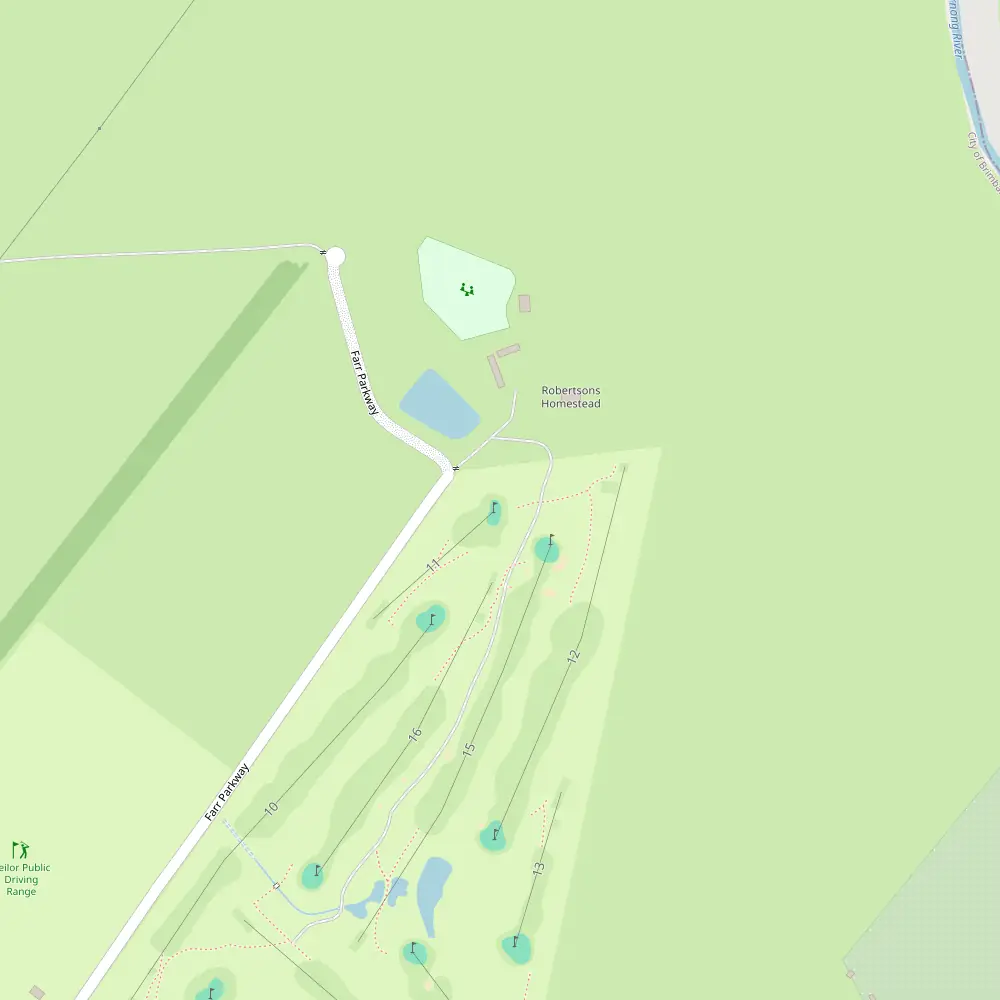
Keilor Public Golf Course Hole 11 – Par 3
Index: 8
Lengths: White: 164 metres, Yellow: 0 metres, Blue: 164 metres, Red: 144 metres
Ah, Hole 11 — a par 3 that doesn’t mess about. Clocking in at 164 metres (179 yards) from both the white and blue tees, and a slightly gentler 144 metres (157 yards) from the reds, this one’s all about precision. With a stroke index of 8, it’s a middle-of-the-road challenge that might seem like a breather but can catch you off guard. The straightforward layout means no hidden tricks up its sleeve — no doglegs, no deceptive bunkers, just you and the green. It’s the kind of hole where the wind can be your best mate or your worst enemy, turning what should be a routine tee shot into a test of nerve and skill. Perfect for a bit of drama in the middle of your round, Hole 11 keeps the game honest and your iron skills sharp.
Keilor Public Golf Course Hole 12 – Par 4
Index: 4
Lengths: White: 357 metres, Yellow: 0 metres, Blue: 357 metres, Red: 302 metres
Ah, the twelfth, she’s a sneaky one. With a par of 4 and a stroke index of 4, this hole is no walk in the park, or should I say stroll on the fairway? Stretching out to 357 meters (390 yards) from both the white and blue tees, and a more approachable 302 meters (330 yards) from the reds, it demands precision right from the tee shot. There’s no room for complacency here; stray a bit too far on your drive and you’ll find yourself grappling with more than just rough nerves. The layout’s deceptively simple, lacking the usual distractions of water or bunkers, but don’t let that fool you. It’s the subtle undulations of the green that’ll test your approach and could leave you muttering over your putter. Navigate this one well, and you’ll feel like a champ; slip up, and it’s a swift reminder of golf’s humbling nature. So, choose your clubs wisely and keep your wits about you!
Keilor Public Golf Course Hole 13 – Par 3
Index: 10
Lengths: White: 162 metres, Yellow: 0 metres, Blue: 162 metres, Red: 124 metres
Hole 13 at our course is a cheeky Par 3 that might look like a breather on the card, but it’s got its ways of keeping things interesting. Measuring 162 metres (177 yards) from both the White and Blue tees, and a more forgiving 124 metres (136 yards) from the Red, it’s deceptively straightforward. No doglegs or daunting water hazards here, but don’t let your guard down. The green is well-guarded with a couple of crafty bunkers ready to humble any over-confident swings. With a stroke index of 10, it’s neither the toughest test on the course nor a guaranteed par, striking a fine balance that can sway your round one way or another. It’s all about choosing the right club and mastering the wind, which always seems keen to join the game here. So, take a deep breath, pick your spot, and let it fly—this hole might just be the dark horse of your scorecard.
Keilor Public Golf Course Hole 14 – Par 3
Index: 12
Lengths: White: 150 metres, Yellow: 0 metres, Blue: 150 metres, Red: 122 metres
Ah, Hole 14, a cheeky Par 3 that might seem a gentle breather at just 150 metres (164 yards) from the white and blue tees, and a slightly softer pitch at 122 metres (133 yards) from the red. Don’t let the lack of a stroke index fool you though; rated 12, it’s like that mate who’s easy-going but can throw a surprise when you least expect it. This hole is straightforward with no flashy hazards to wrestle with, making it a prime spot to regain some ground or, for the bolder players, make a daring bid for birdie. It’s all about choosing the right club and mastering the tee shot. Nail that, and you’re in for a smooth sail to the green, but get too cocky, and you’ll find the simplicity of the hole can be quite deceptive. A solid hole where strategy meets serenity, and a good test of precision and calm.
Keilor Public Golf Course Hole 15 – Par 5

Index: 14
Lengths: White: 415 metres, Yellow: 0 metres, Blue: 415 metres, Red: 374 metres
Hole 15, a Par 5 stretching 415 metres (454 yards) from the white and blue tees, offers a bit of a breather with its generous fairways and a stroke index of 14. Don’t let your guard down, though; a strategically placed bunker on the right side of the fairway has ruined many a good scorecard — it’s almost as popular as a sunny day at Bondi! For those teeing off from the red markers, you’re looking at 374 metres (409 yards) to the pin, which might just give you the edge you need. This hole is all about placement and pacing. Whether you’re trying to outsmart that bunker or setting up for a clear shot at the green, it’s a classic risk vs. reward scenario that keeps the game interesting. Play it smart, and you might walk away with a satisfying score.
Keilor Public Golf Course Hole 16 – Par 4

Index: 16
Lengths: White: 331 metres, Yellow: 0 metres, Blue: 331 metres, Red: 291 metres
Ah, Hole 16, a bit of a breather at a par 4, stretching 331 metres (362 yards) from both the white and blue tees, with the red tees giving a slight nudge closer at 291 metres (318 yards). Now, don’t let the Stroke Index of 16 fool you into complacency; it’s easier on paper than many, but it demands a strategic mind. The fairway here is straightforward, no cunning doglegs or cheeky water hazards to ruin your stroll towards the green. But here’s where it gets interesting — the approach. Precision is key, as the green is more guarded than a vault at Fort Knox. So, choose your clubs wisely and maybe, just maybe, you’ll walk off with a grin rather than a grimace. It’s all about placing your shots smartly rather than powering through. A tactical delight, this one!
Keilor Public Golf Course Hole 17 – Par 4
Index: 17
Lengths: White: 298 metres, Yellow: 0 metres, Blue: 298 metres, Red: 281 metres
Ah, Hole 17, a sneaky Par 4 that might seem like a gentle stroll at 298m (326y) from the white and blue tees, and a slightly shorter jaunt at 281m (307y) from the red. Don’t let the stroke index of 17 fool you into complacency. While it might lack the dramatic flair of signature holes—no ominous water hazards or maze-like bunkers here—the true challenge lies in its subtlety. The absence of traditional obstacles means your approach is all about precision and managing the lie. The green is more elusive than it appears, often coaxing players into a false sense of security. Navigate this one with care, or you’ll find yourself recounting tales of ‘the one that got away’ rather than celebrating a birdie as you polish off the round.
Keilor Public Golf Course Hole 18 – Par 4

Index: 6
Lengths: White: 321 metres, Yellow: 0 metres, Blue: 321 metres, Red: 284 metres
Ah, Hole 18, she’s a sly one to cap off your round. Par 4, with a stroke index of 6, it’s hardly a walk in the park. Measuring up at 321 metres (351 yards) from both the white and blue tees, and a slightly more forgiving 284 metres (311 yards) from the red, this hole is a strategic puzzle wrapped in a scenic bow. The real chatter here? Those trees. Planted cheekily in the centre, they dare you to choose your path wisely or pay the price. No bunkers to spoil your day, but don’t let your guard down. The fairway is an open invitation to show what you’ve learned from the previous 17. A sound drive avoiding the arboreal obstacles sets you up for a clear approach, making a satisfying par well within reach as you close your day. Remember, it’s not just about power here, but precision and decision-making. So choose wisely, swing confidently, and maybe, just maybe, you’ll finish strong with a story to boast about back at the clubhouse.
Course Stats Summary
- Holes: 18
- Total Par: 70
- Longest Hole: 473 metres
- Shortest Hole: 124 metres