


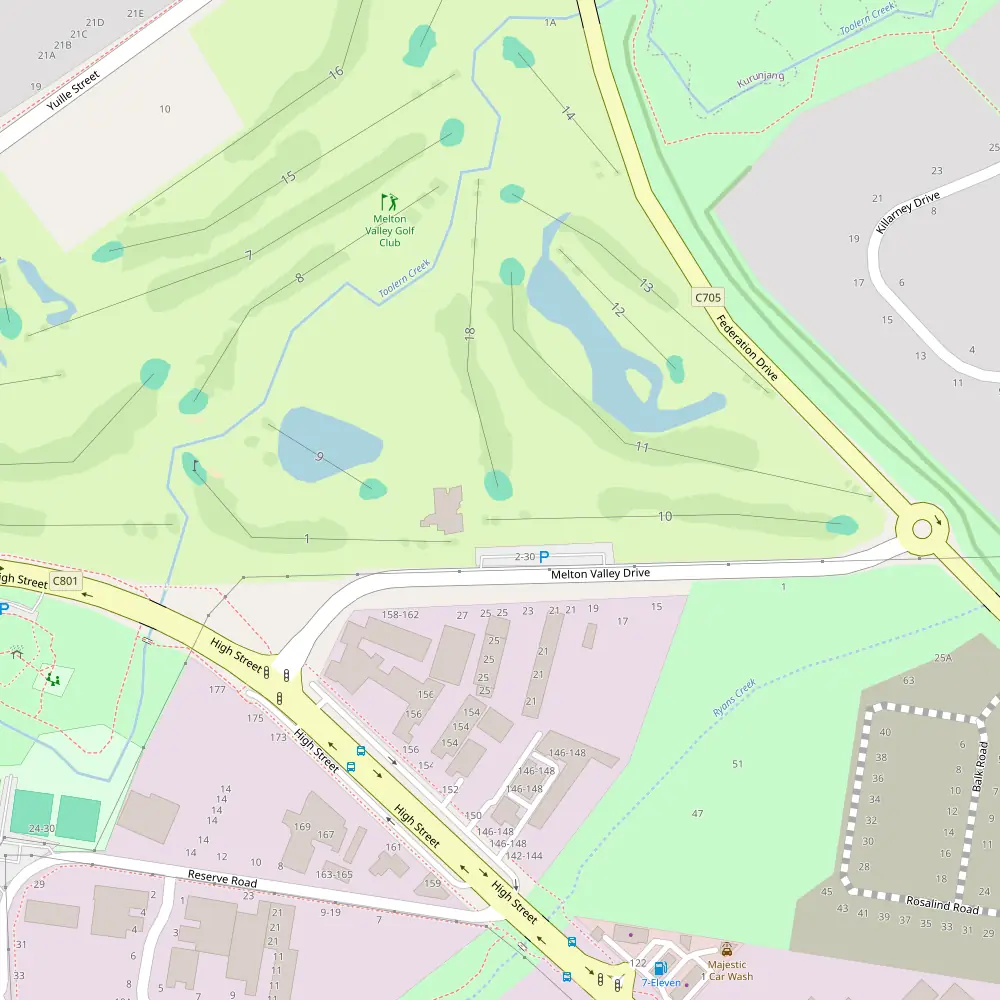
Just a stone’s throw from Melbourne CBD—well, more like a 45-minute trek if the traffic’s behaving—lies the “Toorak of the West”: Melton. And nestled in this suburban oasis is a cracking 18-hole golf course that’s as cheeky as it is charming.
Whether you’re a seasoned stick-slinger or just out for a bash with mates, the variety of tee options (White, Yellow, Blue, Red) means everyone’s got a shot at glory—or at least avoiding total disaster.
Right off the bat, the course doesn’t throw you into the deep end. Hole 1 is a polite Par 4 stretching a comfy 256m (280y) from the white tees. It’s like the course giving you a nod and saying, “Go on, warm up the swing.” With a stroke index of 16, it’s ideal for dusting off the cobwebs without any unwelcome surprises.
But don’t get too comfy. Things start to heat up quickly with Hole 2—a crafty Par 4 measuring 389m (425y) from the blues. This one’s a thinker, ranked with a Stroke Index of 5, and it demands a bit of brain behind the brawn. It’s as inviting as a Sunday arvo barbie, but if you’re not switched on, your second shot might come with regrets.
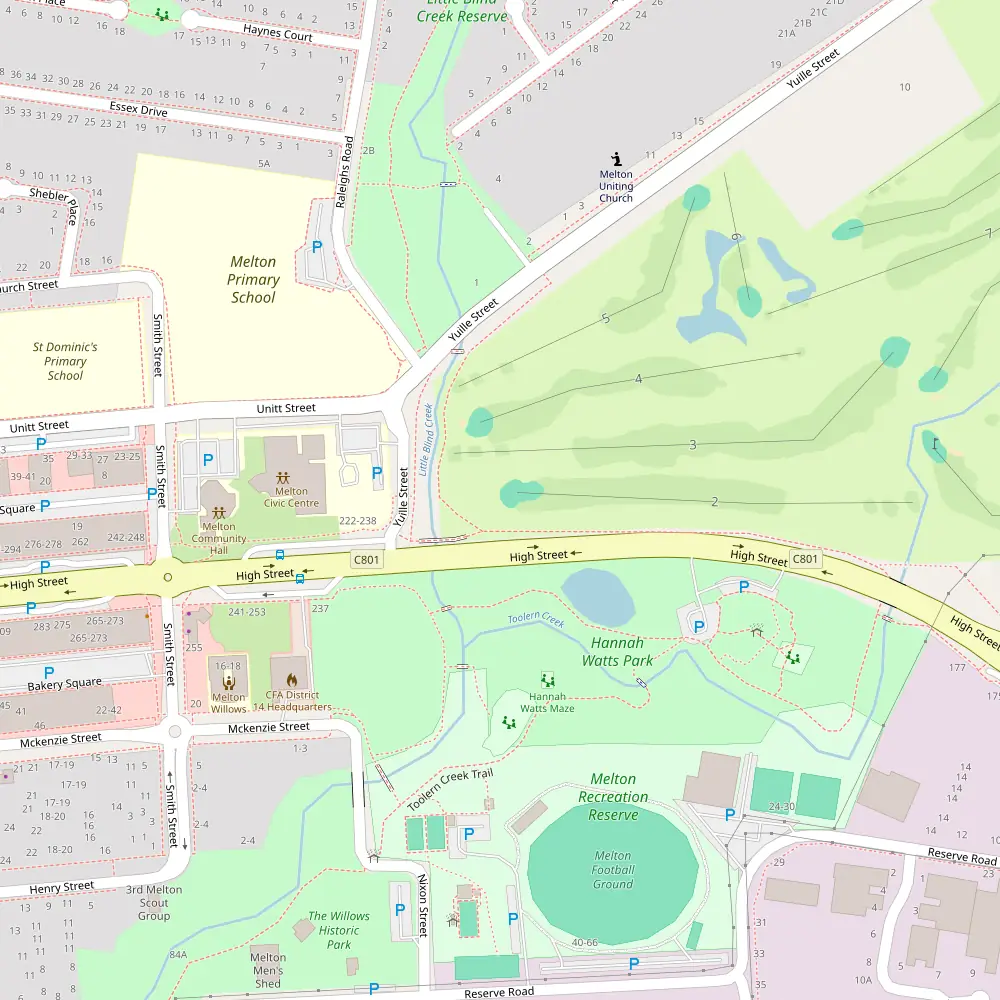
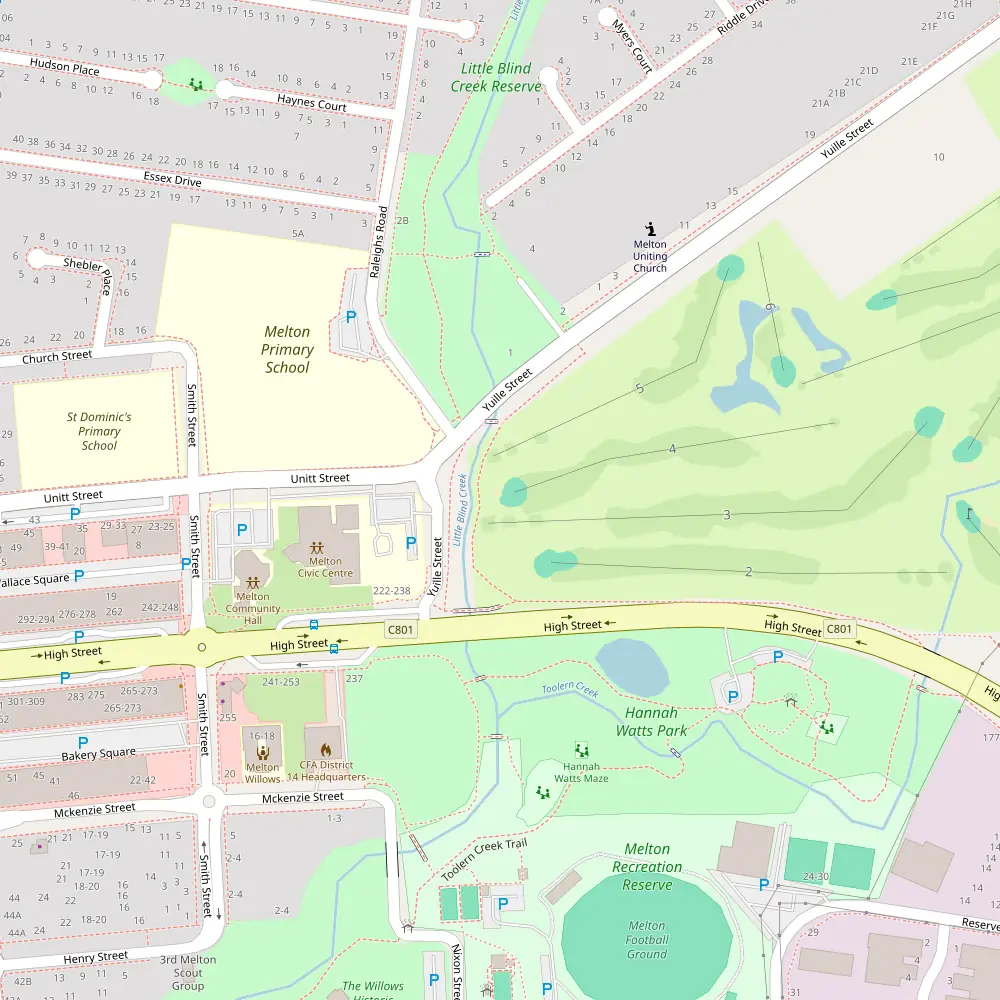
Just when you reckon you’ve got the rhythm sorted, along comes Hole 3. A sprawling Par 5 at 463m (506y) from the whites, it’s time to let the big dog eat. Luckily, it’s ranked as the easiest hole on the course, so it’s your chance to have a fair crack without too much stress—just don’t slice it into next week.
What makes this course sing isn’t just the layout—it’s the whole experience. There’s plenty of elevation change to keep things interesting, water hazards that pop up when you least want them to, and lush, tree-lined fairways that aren’t afraid to punish a wonky shot.
Each hole has its own personality, and the mix of challenges means you’re always thinking, adjusting, and probably having a laugh (or a quiet swear) along the way.
So, if you’re chasing a proper day out with a bit of bite and a lot of heart, this Melton track is well worth the drive. Swing by, soak up the vibes, and see how your game stacks up. It’s a fair dinkum good time, whether you’re chasing birdies or just happy to be out in the sun.
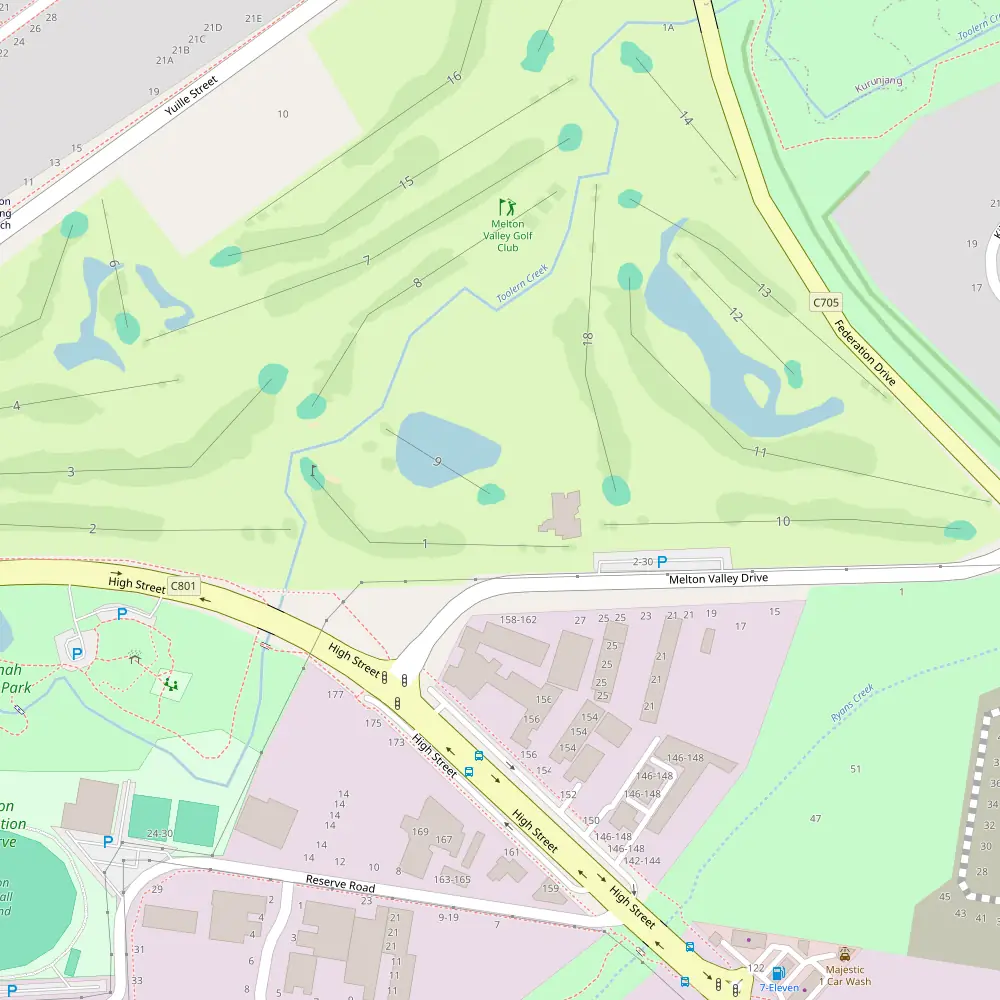
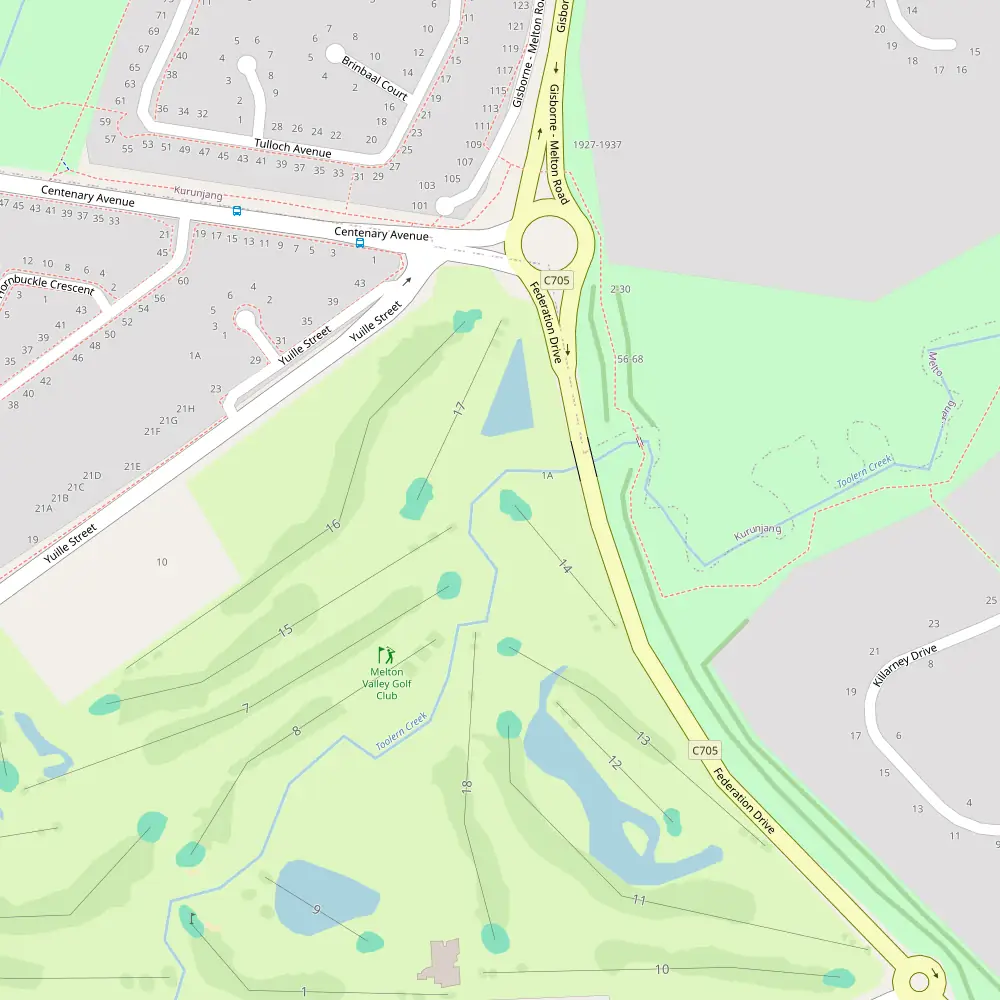
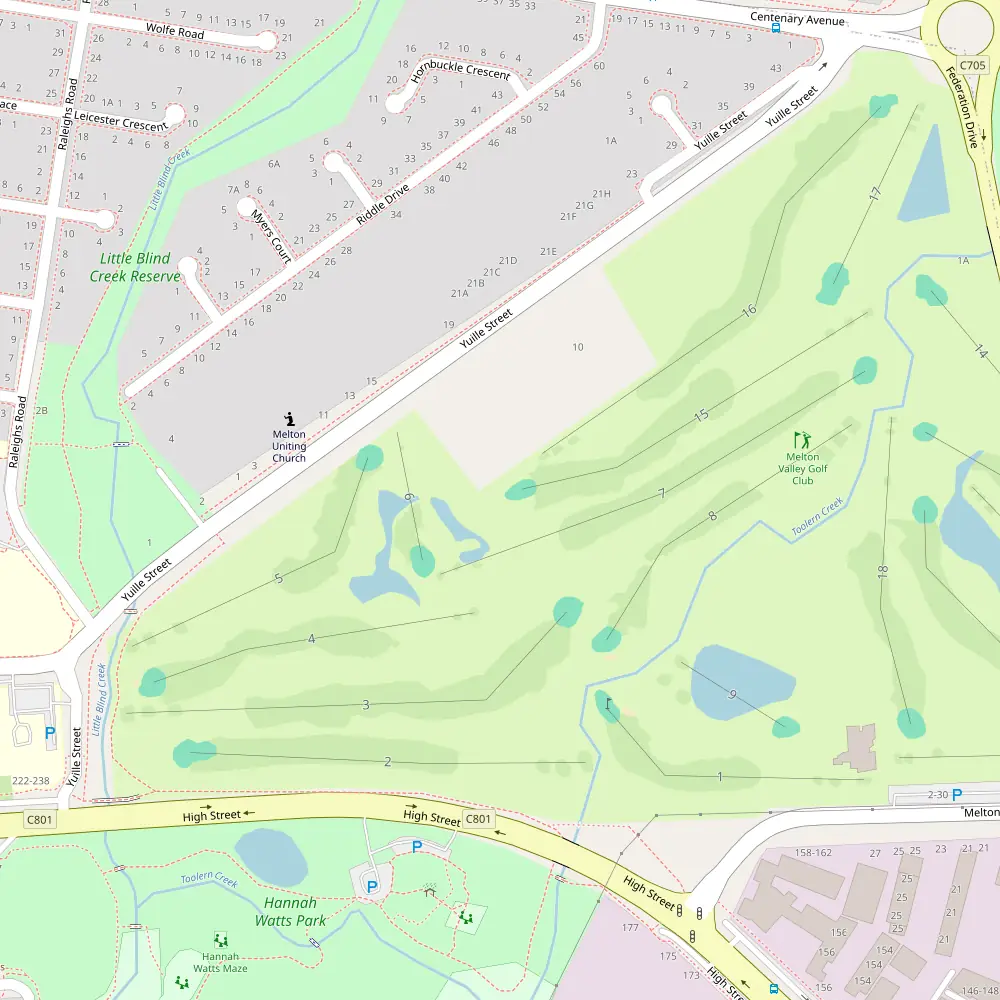
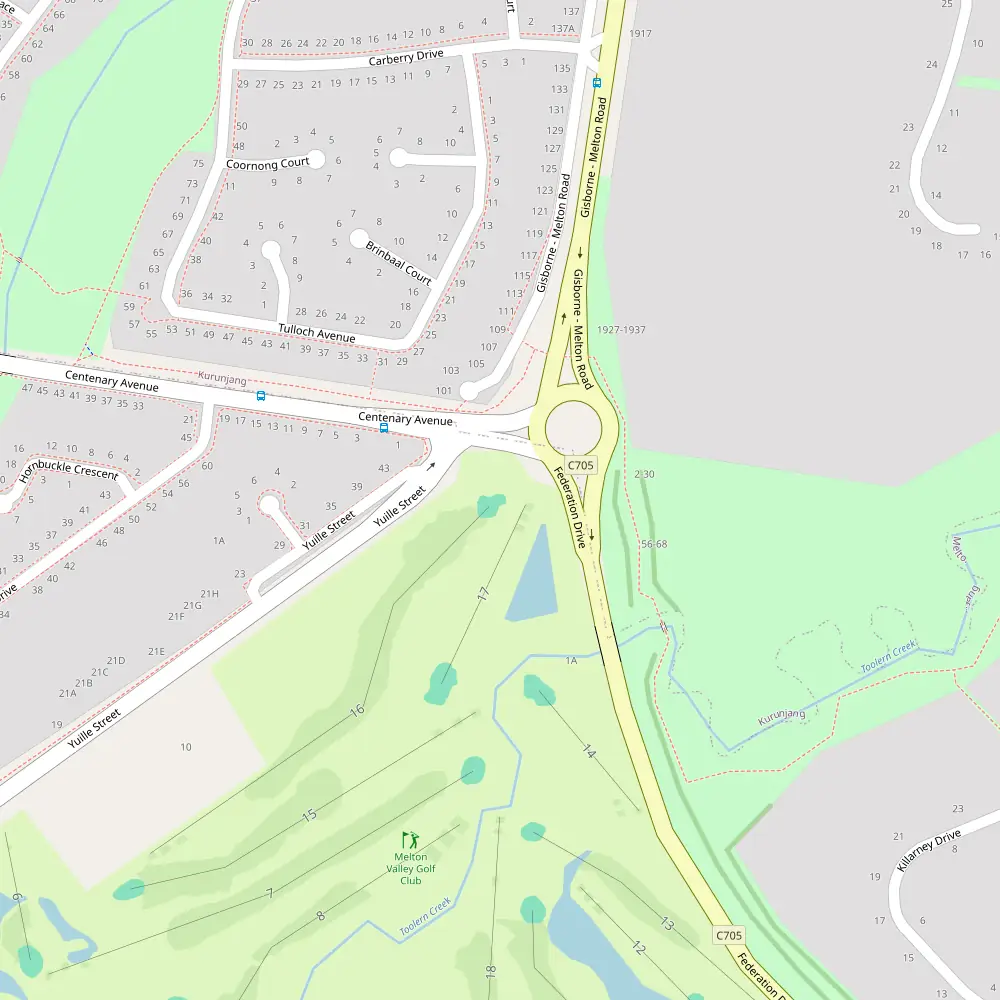
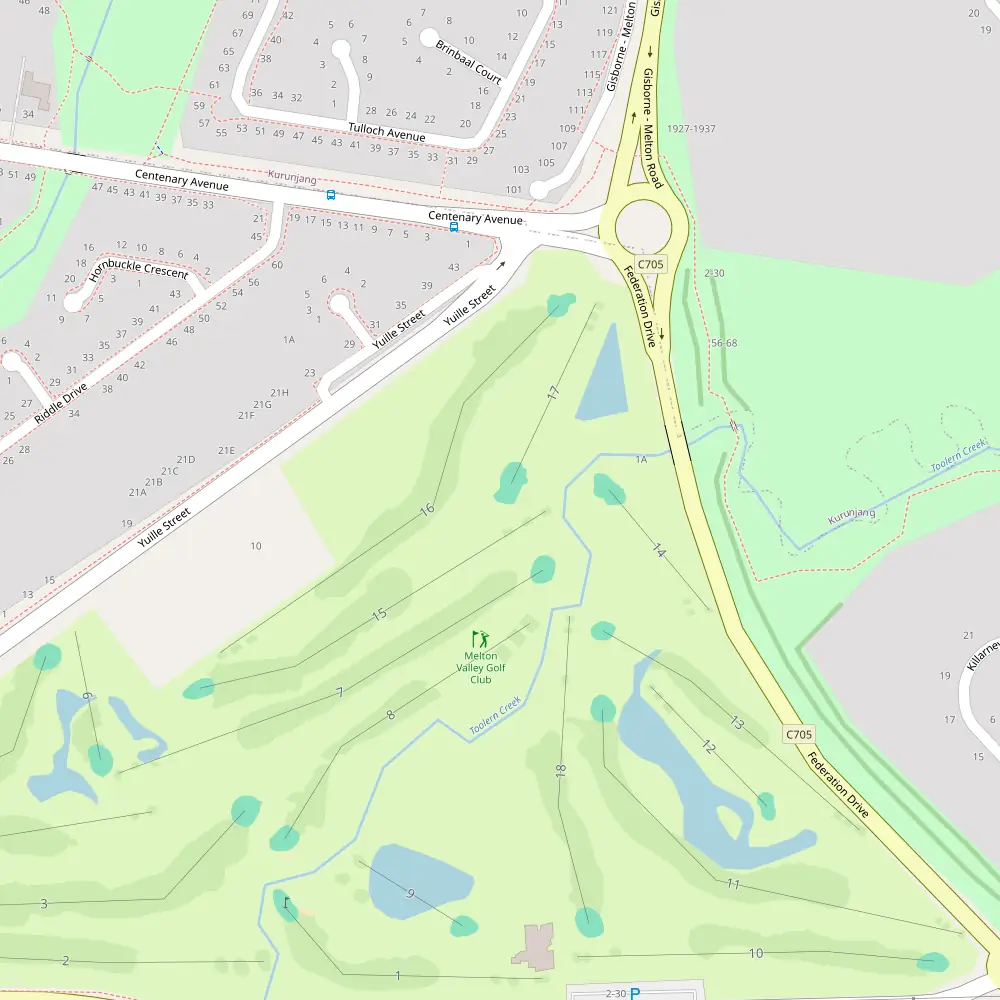
Location: 2-30 Melton Valley Drive, Melton, VIC, Australia
Website: http://www.meltongolf.com.au
Phone: +61 03 9747 8216
Tee Boxes
| Tee | Yardage | Course Rating | Slope |
|---|---|---|---|
| White | 5393 | ||
| Yellow | 0 | ||
| Blue | 5752 | ||
| Red | 4983 |
Hole by Hole Breakdown
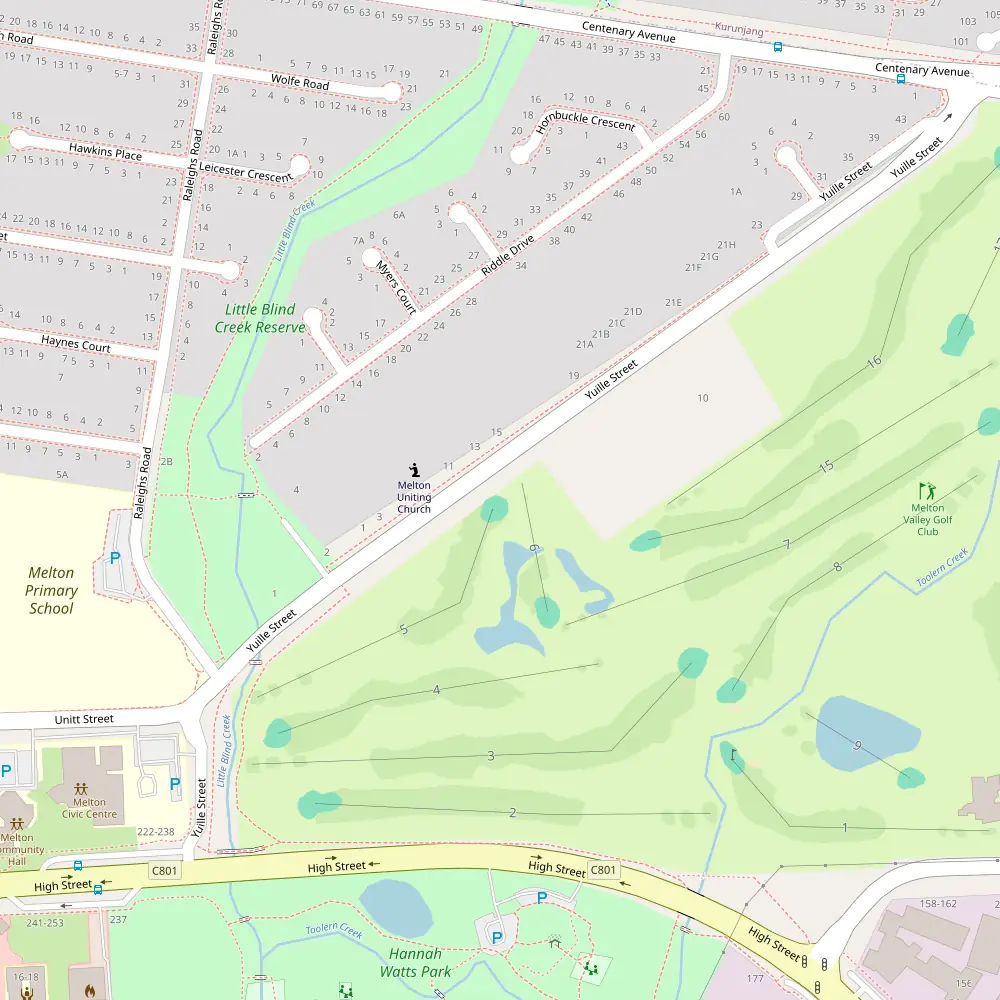
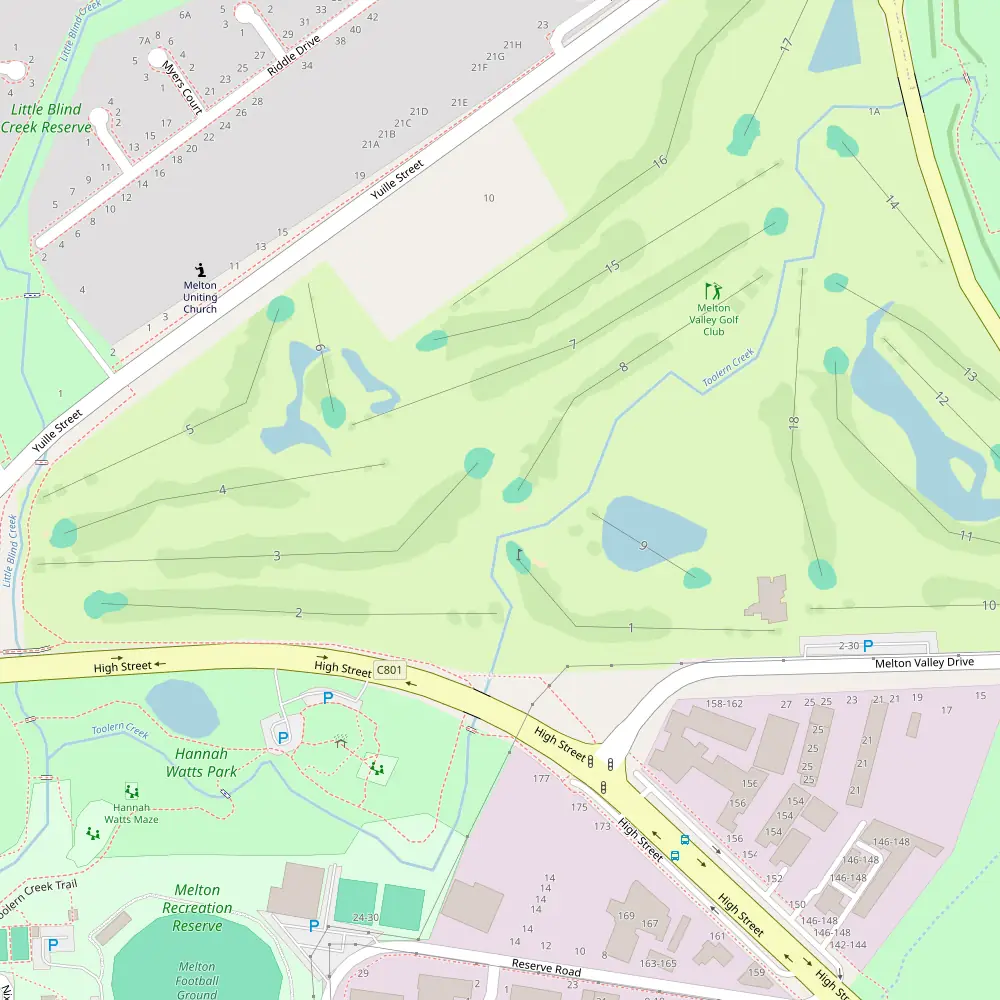
Melton Valley Golf Club Hole 1 – Par 4
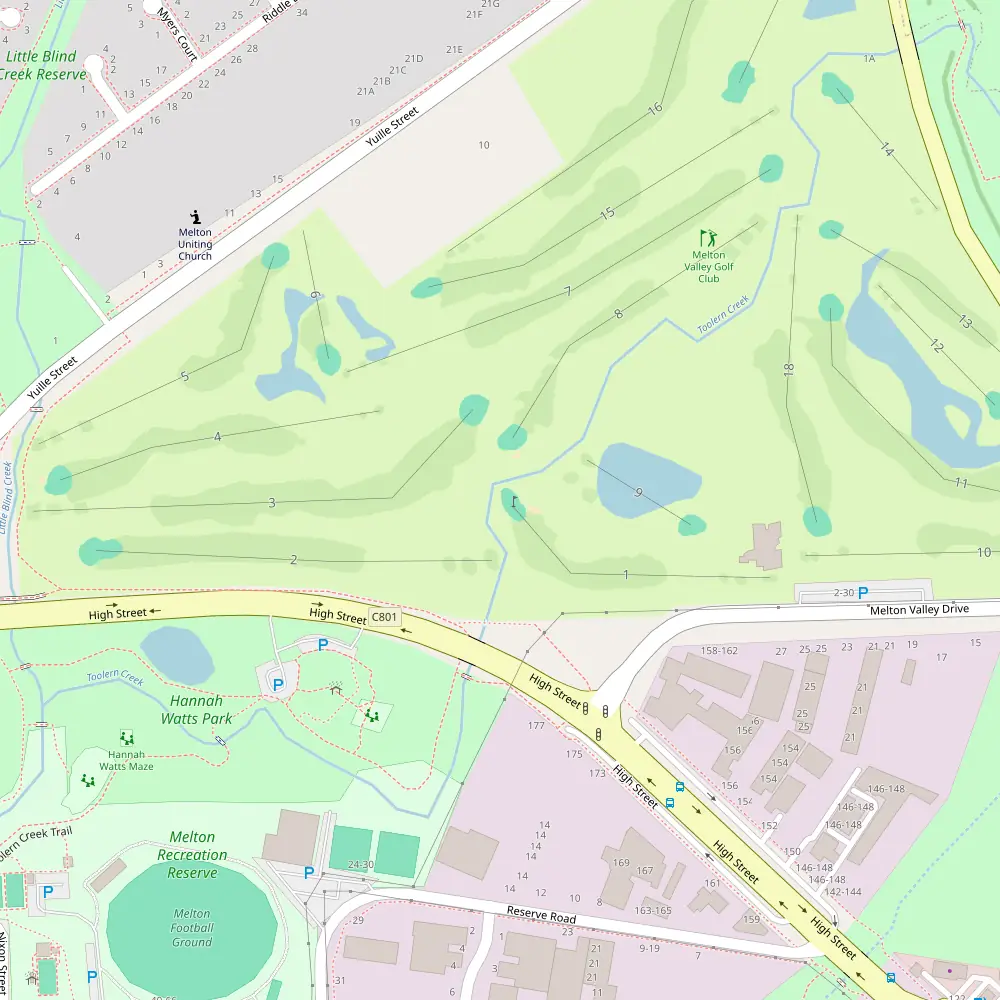
Index: 16
Lengths: White: 256 metres, Yellow: 0 metres, Blue: 285 metres, Red: 235 metres
Hole 1 at our course is all about easing you into the game with a gentle handshake rather than a punch. A short Par 4, stretching 256 metres (280 yards) from the white tees, 285 metres (312 yards) from the blue, and 235 metres (257 yards) from the red, it’s ranked 16th in difficulty, giving you a chance to find your rhythm without too much stress. There’s no dramatic scenery or treacherous hazards to distract you here; just straightforward golf with a fairway generous enough to forgive a less-than-perfect tee shot. The green is approachable, with ample room for error, making it ideal for warming up your short game. It’s a breather of a start, but don’t get too cosy—the course has plenty of challenges up its sleeve as you move forward.
Melton Valley Golf Club Hole 2 – Par 4
Index: 5
Lengths: White: 345 metres, Yellow: 0 metres, Blue: 389 metres, Red: 344 metres
Ah, Hole 2, a sly beast of a Par 4 that stretches its legs to 389m (425y) from the blue tees, with the reds nipping at your heels at 344m (376y). Don’t be fooled by the apparent simplicity; this hole’s a thinker. Ranked with a Stroke Index of 5, it demands respect and a solid strategy. Here’s where your driver might stay in the bag, depending on the wind’s mood. The fairway’s as inviting as a cold pint on a hot day, but it’s the approach that’ll test your mettle. No flashy water hazards or celebrity bunkers here, just pure, unadulterated golf. Aim true and hold your nerve – success on this hole feels as good as a birdie, even if you’re just writing par on the card.
Melton Valley Golf Club Hole 3 – Par 5
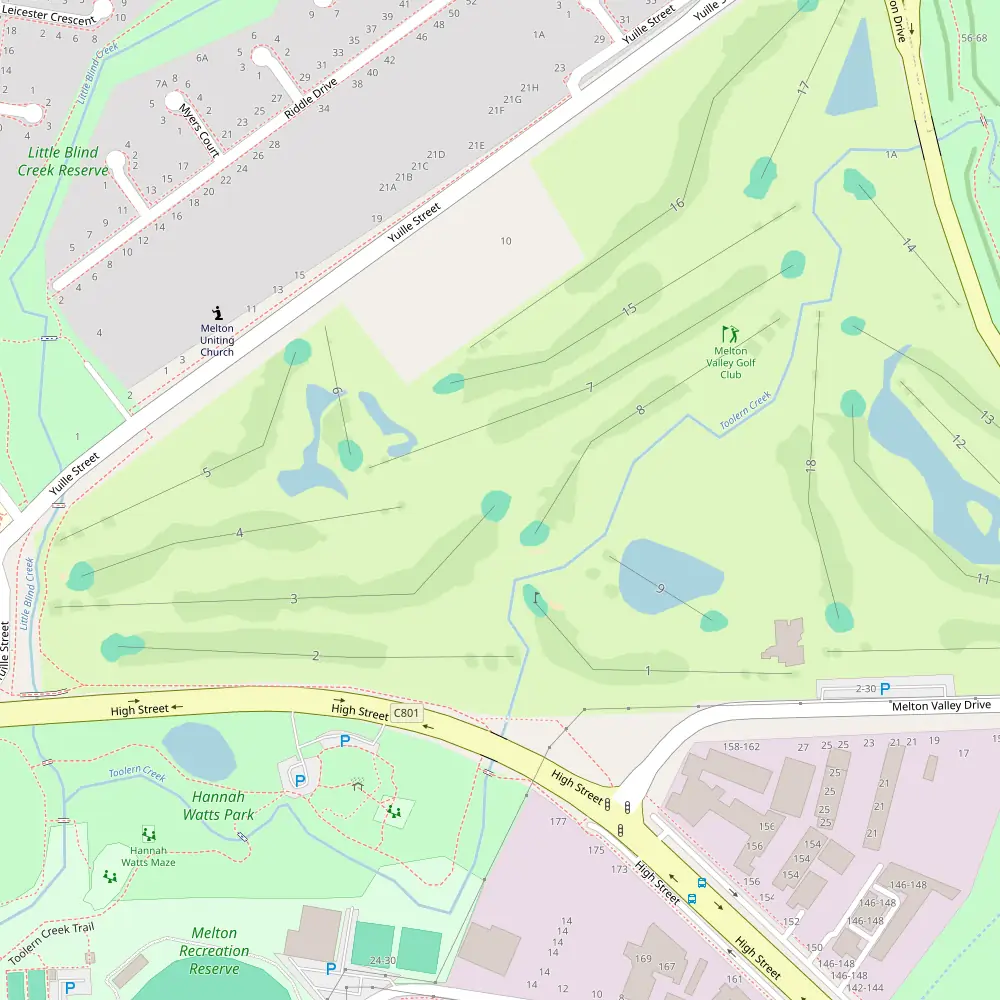
Index: 18
Lengths: White: 463 metres, Yellow: 0 metres, Blue: 465 metres, Red: 431 metres
Ah, Hole 3, a breezy par 5 that stretches out like a lazy Sunday. At 463 metres (506 yards) from the white tees and 465 metres (508 yards) from the blue, it’s a chance to let the big dog eat and maybe, just maybe, get there in two. The red tees offer a slightly shorter jaunt at 431 metres (471 yards), but don’t be fooled — this hole isn’t just a walk in the park. With a stroke index of 18, it’s the easiest on the card, which means it’s ripe for scoring if you play your cards right. There aren’t any standout tricks or traps here; it’s all about how you handle your swing and manage the fairway. Perfect for a bit of strategic play or to recover from a tough start, Hole 3 offers a gentle nudge rather than a stern test. Keep it straight, keep it long, and this hole could be the confidence booster you need to set the pace for the rest of the round.
Melton Valley Golf Club Hole 4 – Par 4
Index: 4
Lengths: White: 348 metres, Yellow: 0 metres, Blue: 362 metres, Red: 308 metres
Hole 4, a par 4 with a stroke index of 4, is where the real challenge kicks in. Stretching 348 metres (380 yards) from the white tees and an even more daunting 362 metres (396 yards) from the blues, it demands both precision and power. The reds offer a slight reprieve at 308 metres (337 yards), but don’t let that fool you. This hole has no flashy distractions like ponds or bunkers cluttering the landscape, but its straightforwardness is precisely what makes it a tough nut to crack. The drive is all about placement; find the fairway or find yourself wrestling with rough that has a bit of a mean streak. As you approach the green, the game turns into a true test of your iron play. Undoubtedly a hole that can make or break your scorecard, it’s a brute that demands respect. So, lace up and swing with your best, mates.
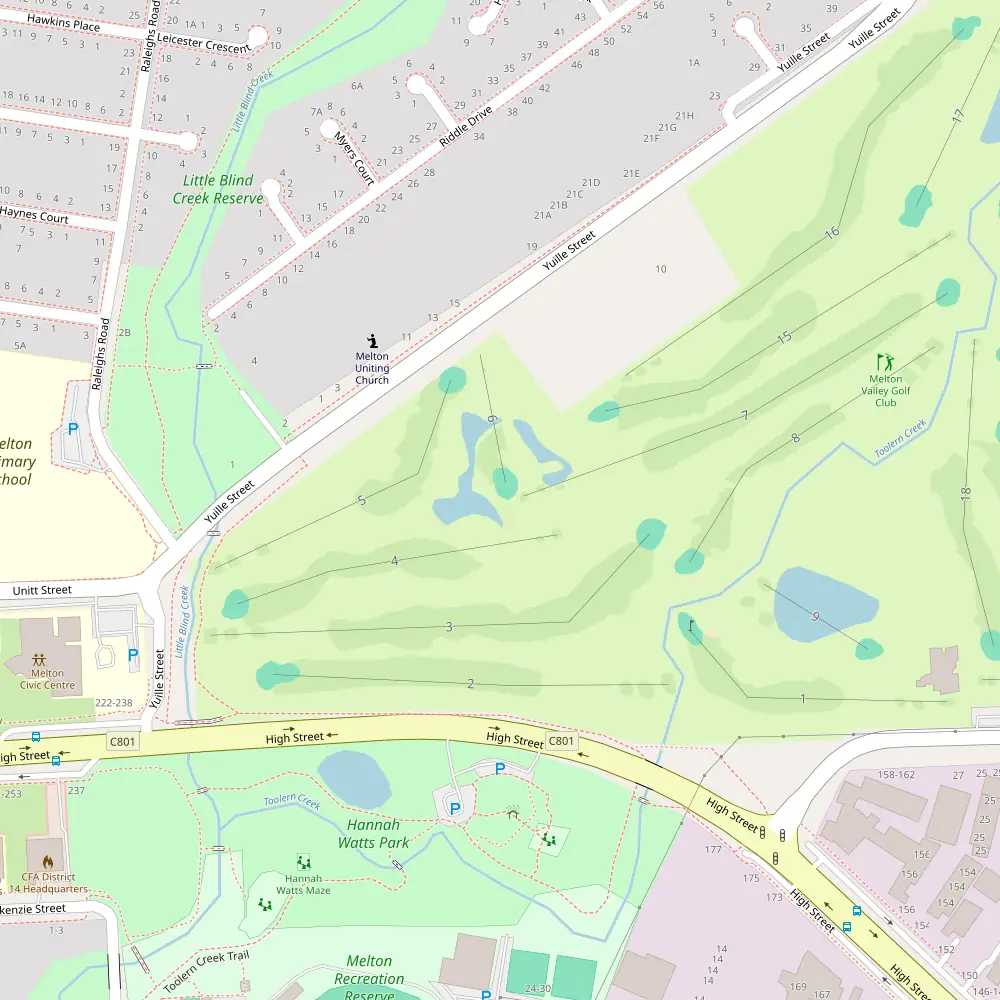
Melton Valley Golf Club Hole 5 – Par 4
Index: 8
Lengths: White: 295 metres, Yellow: 0 metres, Blue: 316 metres, Red: 255 metres
Ah, Hole 5, a tidy par 4 that’s a bit more than just a walk in the park. Stretching out 295 metres (323 yards) from the white tees and pushing up to 316 metres (346 yards) from the blues, it offers a cheeky challenge with its Stroke Index of 8. There’s no yellow tee mileage to mention, and from the reds, it’s a more manageable 255 metres (279 yards). No signature points of interest here, but don’t let its straightforward look fool you — the true test lies in mastering the tee shot and navigating the subtle undulations that can turn a good second shot sour if you’re not careful. It’s the kind of hole that might not make the postcard, but it’ll definitely make your round, especially if you play it smart. Perfect for a bit of strategic play, this hole keeps your round interesting without any dramatics.
Melton Valley Golf Club Hole 6 – Par 3
Index: 14
Lengths: White: 126 metres, Yellow: 0 metres, Blue: 143 metres, Red: 119 metres
Ah, Hole 6, a cheeky little par-3 that might seem a breeze at first glance but don’t let its modest distances fool you. From the white tees, it stretches out to 126 metres (138 yards), and for those looking to add a bit more challenge, the blue tees push it to 143 metres (156 yards). The red tees offer a slight reprieve at 119 metres (130 yards). Interestingly, there’s no yellow tee marker here, perhaps a subtle nod from the designers for a quick progression. With a stroke index of 14, this hole is more about precision than power. There’s no grand scenery or dramatic hazards, but positioning is key — a straightforward test of your short game where club selection can make or break your par. It’s one of those holes where the seasoned can shine and the rookies can learn a thing or two about the finesse of golf.
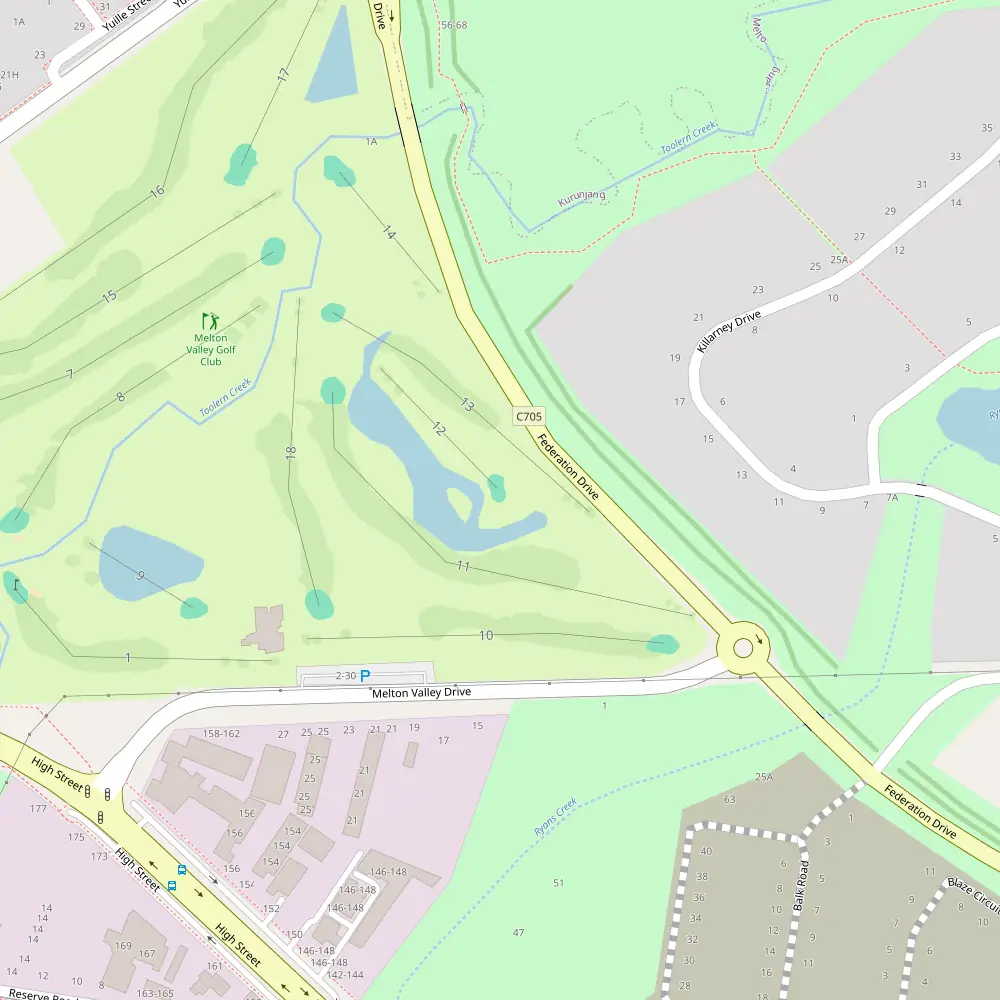
Melton Valley Golf Club Hole 7 – Par 5
Index: 13
Lengths: White: 454 metres, Yellow: 0 metres, Blue: 460 metres, Red: 420 metres
Ah, Hole 7, a par 5 that stretches out a hearty 454m (497y) from the white tees and offers a bit of a breather with a stroke index of 13. From the blue markers, it nudges a bit further at 460m (503y), while the reds are a tad more forgiving at 420m (459y). There’s no flashy water to make your knees knock or dense woodland to gobble up wayward balls, but don’t let the apparent simplicity fool you. The beauty of this hole lies in its straightforward challenge; it’s all about the purity of the game here. With a wide-open fairway that beckons the big hitters to unleash their drivers, the real test is setting up a strategic second shot. The approach to the green is where your mettle is tested, making it a sublime mix of power and precision. It’s the kind of hole that feels like a quiet chat among mates rather than a shout—and it’s just as satisfying.
Melton Valley Golf Club Hole 8 – Par 4
Index: 7
Lengths: White: 299 metres, Yellow: 0 metres, Blue: 325 metres, Red: 290 metres
Ah, Hole 8, a sneaky par 4 that’s shorter than a pub yarn but punches well above its weight with a stroke index of 7. From the tee, you’ve got choices aplenty. At 299 metres (327 yards) from the white, 325 metres (355 yards) from the blue, and a slightly more forgiving 290 metres (317 yards) from the red, your driver might be itching to swing. But don’t be fooled; precision here pays dividends. The fairway might look welcoming, but it narrows just where you don’t want it to, coaxing you into a game of risk and reward. There’s no standout bunkers or water hazards, just the pure challenge of keeping it on the straight and narrow. Play it smart, and you could be walking off this green with a grin, ready to brag about that birdie at the 19th hole.
Melton Valley Golf Club Hole 9 – Par 3
Index: 17
Lengths: White: 123 metres, Yellow: 0 metres, Blue: 126 metres, Red: 100 metres
Ah, Hole 9! Here we’ve got a tidy Par 3 that lets you breathe a bit before the turn. Stretching out at 123 metres (134 yards) from the white tees, 126 metres (138 yards) from the blues, and a friendly 100 metres (109 yards) from the reds, it’s a straightforward affair with a low stroke index of 17, suggesting fewer headaches than most. No dramatic doglegs or treacherous water hazards here, just a clean shot to the green and a decent chance to score well if your short game’s up to scratch. Perfect for a bit of a competitive nudge with your mates or a chance to recover from earlier mishaps. So, take a moment, line up your shot, and maybe, just maybe, you’ll walk away with a birdie to brag about as you saunter up to the clubhouse.
Melton Valley Golf Club Hole 10 – Par 4
Index: 6
Lengths: White: 324 metres, Yellow: 0 metres, Blue: 342 metres, Red: 315 metres
Ah, Hole 10, the unsuspecting brute of the back nine. With a par of 4 and sporting a stroke index of 6, don’t let the apparent simplicity fool you. At 342 metres (374 yards) from the blue tees, it’s a stretch that demands both power and precision. The white tees offer a slight reprieve at 324 metres (354 yards), while the reds are set at a more forgiving 315 metres (345 yards). There’s no flashy water to contend with or towering trees to curse at, but the layout here is all about strategic play. The fairway seems welcoming enough, yet positioning is key to avoid a scorecard disaster. Perfect for those who fancy themselves a tactician on the turf, this hole is less about the spectacle and more about smart, thoughtful drives. So, choose your club wisely, aim your shots with care, and maybe, just maybe, you’ll tame this subtle beast.
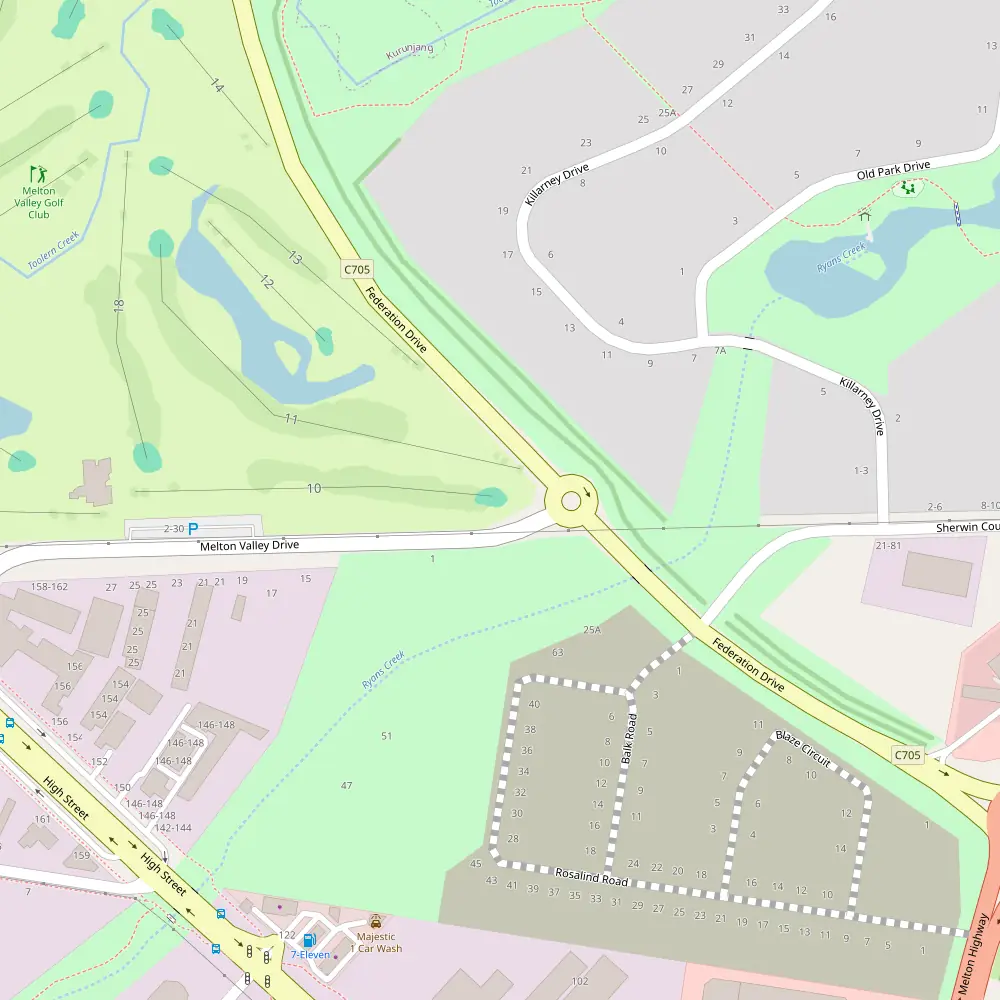
Melton Valley Golf Club Hole 11 – Par 5

Index: 12
Lengths: White: 441 metres, Yellow: 0 metres, Blue: 468 metres, Red: 424 metres
Ah, Hole 11 – a par 5 that’s a bit of a breather with a stroke index of 12. Stretching out to 468m (512y) from the blue tees, 441m (482y) from the whites, and a more approachable 424m (464y) from the reds, this hole offers a straightforward challenge without the frills. No dramatic doglegs or treacherous water hazards here, just pure, unadulterated golf. The absence of notable features means your strategy on this hole is all about placement and power. The fairway is generous enough to forgive a less-than-perfect drive, and the green is accessible, tempting the bolder players to go for it in two. Perfect for those looking to recover some ground or simply enjoy a solid, steady part of the round without the theatrics.
Melton Valley Golf Club Hole 12 – Par 3
Index: 2
Lengths: White: 162 metres, Yellow: 0 metres, Blue: 188 metres, Red: 135 metres
Ah, Hole 12, the sleeper of the course — a deceptively challenging Par 3, stretching out to a tidy 188m (206y) from the blue tees, and not shy at 162m (177y) from the whites, while the reds give a bit of a breather at 135m (148y). No fancy points of interest here, just pure, strategic golf. With a stroke index of 2, this hole is no walk in the park. It demands precision off the tee, and there’s little margin for error. Whether it’s the wind that often likes to join the game, or the subtle undulations of the green that toy with your putts, this hole keeps even the seasoned players on their toes. The key here? Choose your club wisely, aim true, and maybe, just maybe, you’ll walk off with your par and a smug smile.
Melton Valley Golf Club Hole 13 – Par 4
Index: 3
Lengths: White: 304 metres, Yellow: 0 metres, Blue: 325 metres, Red: 256 metres
Ah, Hole 13, a sneaky Par 4 that’s more cunning than a fox on the fairways. At 304 metres (333 yards) from the white tees and stretching out to 325 metres (355 yards) from the blues, this hole doesn’t mess about. The reds offer a gentler 256 metres (280 yards), but don’t be fooled into thinking this is a walk in the park. Ranked Stroke Index 3, it demands respect and precision. Without a landmark in sight, the challenge here lies in mastering the subtle undulations of the green and navigating the strategic placement of bunkers eager to ruin your scorecard. This hole is a test of nerve and skill, where the bold can be rewarded and the timid might just wish they’d stayed at the clubhouse. Play it smart, and you might just conquer one of the course’s more formidable puzzles.
Melton Valley Golf Club Hole 14 – Par 3
Index: 11
Lengths: White: 138 metres, Yellow: 0 metres, Blue: 149 metres, Red: 120 metres
Hole 14 at our course is a deceptive little par 3 that can either make or break your scorecard. With a stroke index of 11, it might seem like a breather, but don’t let your guard down. From the white tee, you’re looking at 138 metres (151 yards) of precision play, while the blue stretches it out to 149 metres (163 yards). If you’re teeing off from the reds, it’s a more manageable 120 metres (131 yards), but whatever the colour, it’s all about club selection and controlling your swing. There’s no significant trouble in terms of bunkers or water hazards, yet the subtly undulating green can surprise the most seasoned players. It’s one of those holes where a well-placed tee shot can set you up for a satisfying par, or even a birdie if the golf gods are smiling. Just remember, it’s not as straightforward as it looks — take a moment, choose wisely, and swing smoothly.
Melton Valley Golf Club Hole 15 – Par 4
Index: 1
Lengths: White: 349 metres, Yellow: 0 metres, Blue: 379 metres, Red: 333 metres
Ah, Hole 15, mate, where the real test begins. Don’t let the absence of traditional distractions fool you; with a stroke index of 1, this par 4 is as challenging as they come. From the tee, you’ve got choices to make, with lengths stretching from the white at 349m (382y) to a more formidable blue at 379m (414y), and the reds offering a slightly kinder 333m (364y). The fairway is a tightrope walk, demanding precision over power, especially with the subtle undulations that can turn a good shot cheeky. The green, well-guarded and subtly contoured, refuses to give up birdies easily. It’s a hole where par feels like a minor victory and anything less should be celebrated with a round at the clubhouse. So, lace up tight, this one’s a real bruiser.
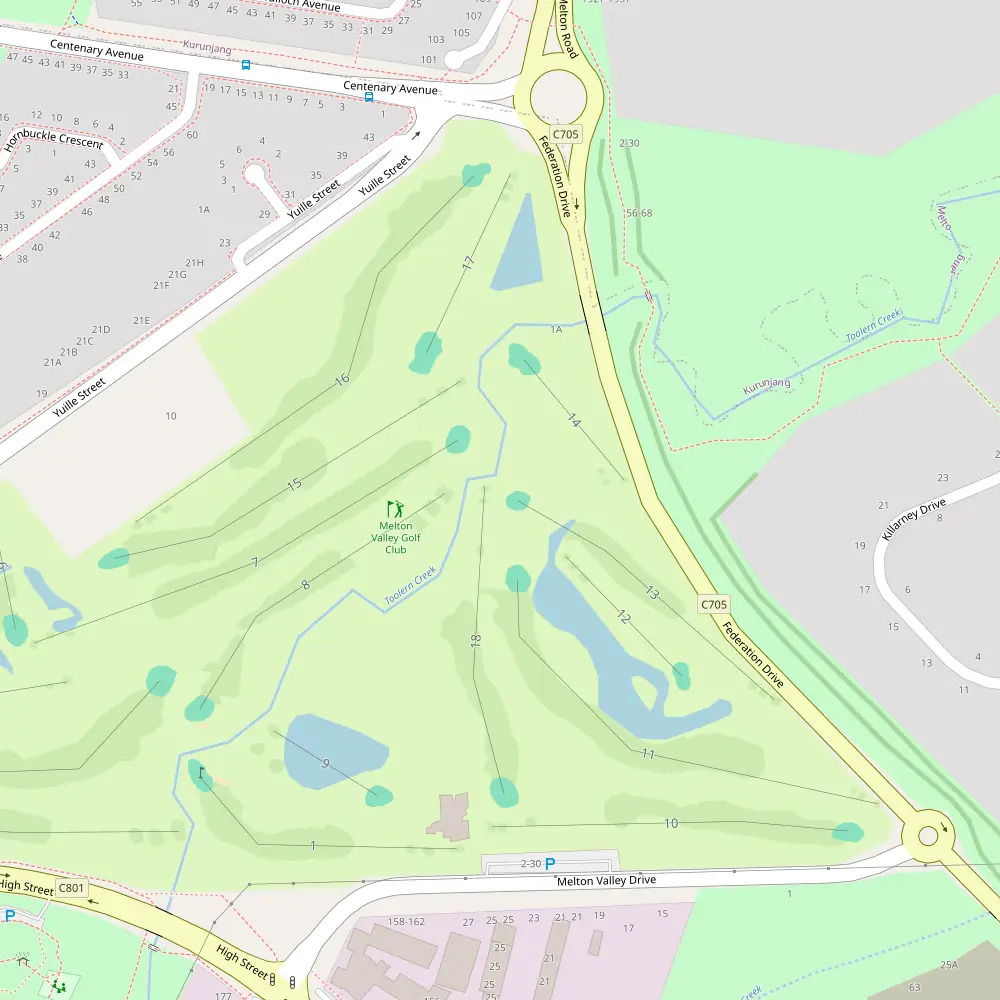
Melton Valley Golf Club Hole 16 – Par 5
Index: 15
Lengths: White: 458 metres, Yellow: 0 metres, Blue: 497 metres, Red: 450 metres
Ah, Hole 16, the quintessential breather before the final stretch, mates. Stretching out to a generous 497m (544y) from the blue tees, 458m (501y) from the whites, and a slightly more accommodating 450m (492y) from the reds, this Par 5 offers a bit of respite with its Stroke Index of 15. The absence of notable hazards gives your nerves a break, but don’t let the lack of drama fool you. The true challenge lies in mastering the art of placement and pacing. Without any significant doglegs or menacing bunkers to wrestle with, your strategy here should be all about power and precision off the tee. Nail that, and you’re setting yourself up for an eagle or a comfy birdie as you soak in the serene surrounds. Just the kind of hole to have a yarn about as you gear up for the grand finale.
Melton Valley Golf Club Hole 17 – Par 3
Index: 10
Lengths: White: 177 metres, Yellow: 0 metres, Blue: 186 metres, Red: 160 metres
Ah, Hole 17, now that’s a cheeky little Par 3 that’ll keep you on your toes. Stretching out at 177 metres (194 yards) from the white tees, it nudges a bit further to 186 metres (203 yards) if you’re bold enough to take it on from the blue. For those playing a bit more conservatively, the reds are set at a manageable 160 metres (175 yards). Don’t let the lack of dramatic features fool you—this hole is deceptively challenging, earning its Stroke Index of 10. The green is straightforward but demands precision; any misjudgement in wind or club selection could have you scrambling for par. It’s a fantastic penultimate test, where the game’s subtleties shine, and where keeping your cool can set you up for a strong finish. So, choose your club wisely, aim true, and perhaps the golf gods will favour you today!
Melton Valley Golf Club Hole 18 – Par 4
Index: 9
Lengths: White: 331 metres, Yellow: 0 metres, Blue: 347 metres, Red: 288 metres
Ah, the grand finale, Hole 18. It’s a par 4 with a bit of cheek, stretching out 331 metres (362 yards) from the white tees, 347 metres (379 yards) from the blue, and a more forgiving 288 metres (315 yards) from the red. With a stroke index of 9, it’s not the toughest nut to crack on the course, but it’ll make you earn your final score. This hole’s all about precision and strategy over sheer power. There’s no standout drama in terms of water hazards or sneaky bunkers, but the true test is in managing your tee shot and approach with smart play. The fairway is straightforward enough, yet it’s the subtle undulations and the green’s sly positioning that can make or break your par here. A solid drive and a keen eye for the green are your tickets to finishing strong—with maybe just enough of a challenge to keep the bragging rights interesting back at the clubhouse.
Course Stats Summary
- Holes: 18
- Total Par: 71
- Longest Hole: 463 metres
- Shortest Hole: 123 metres


