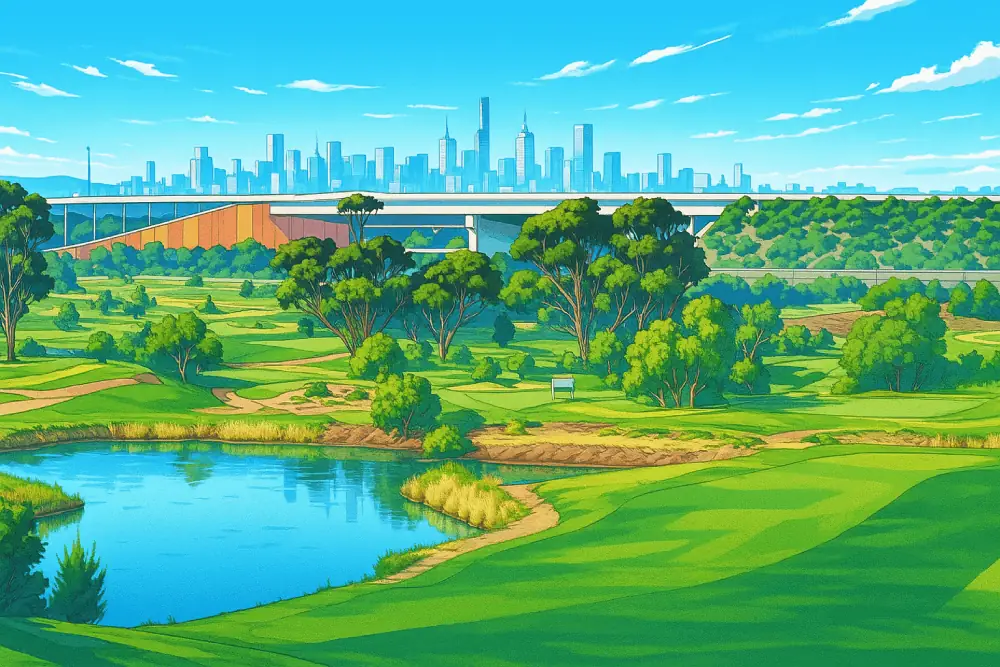
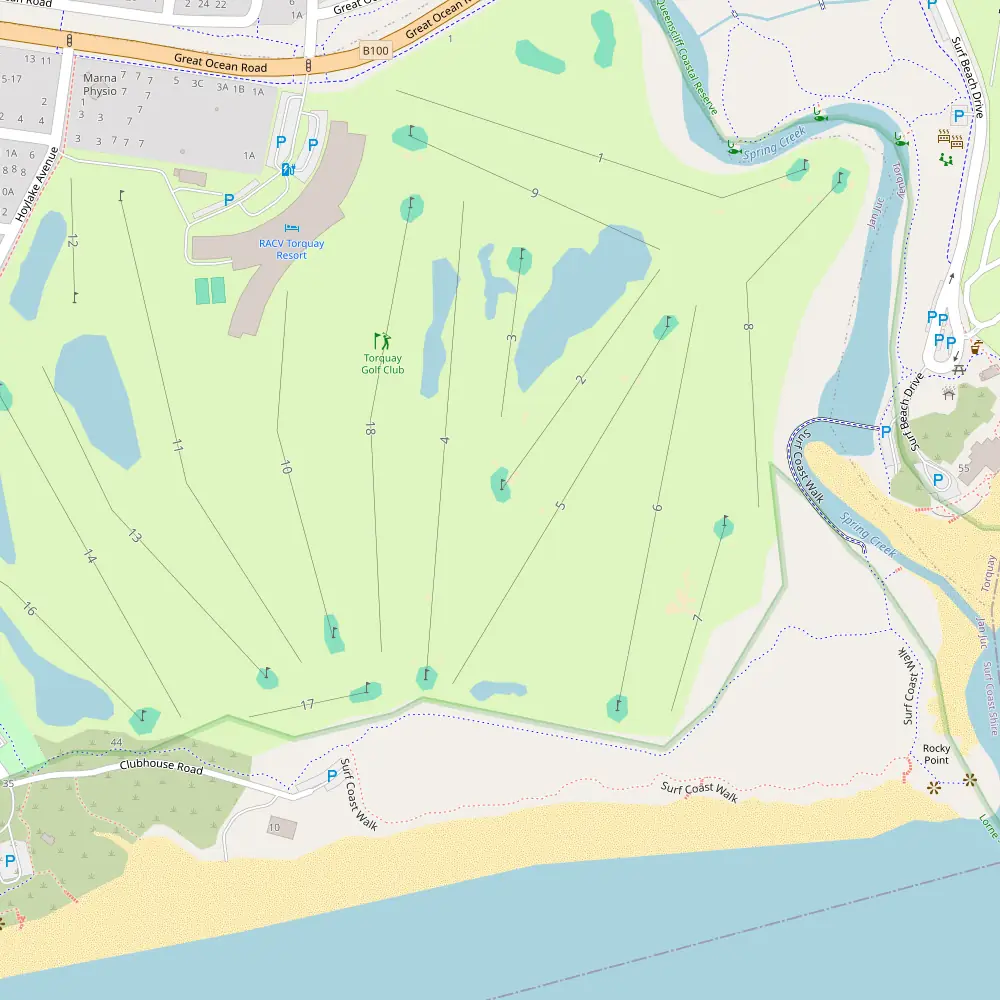
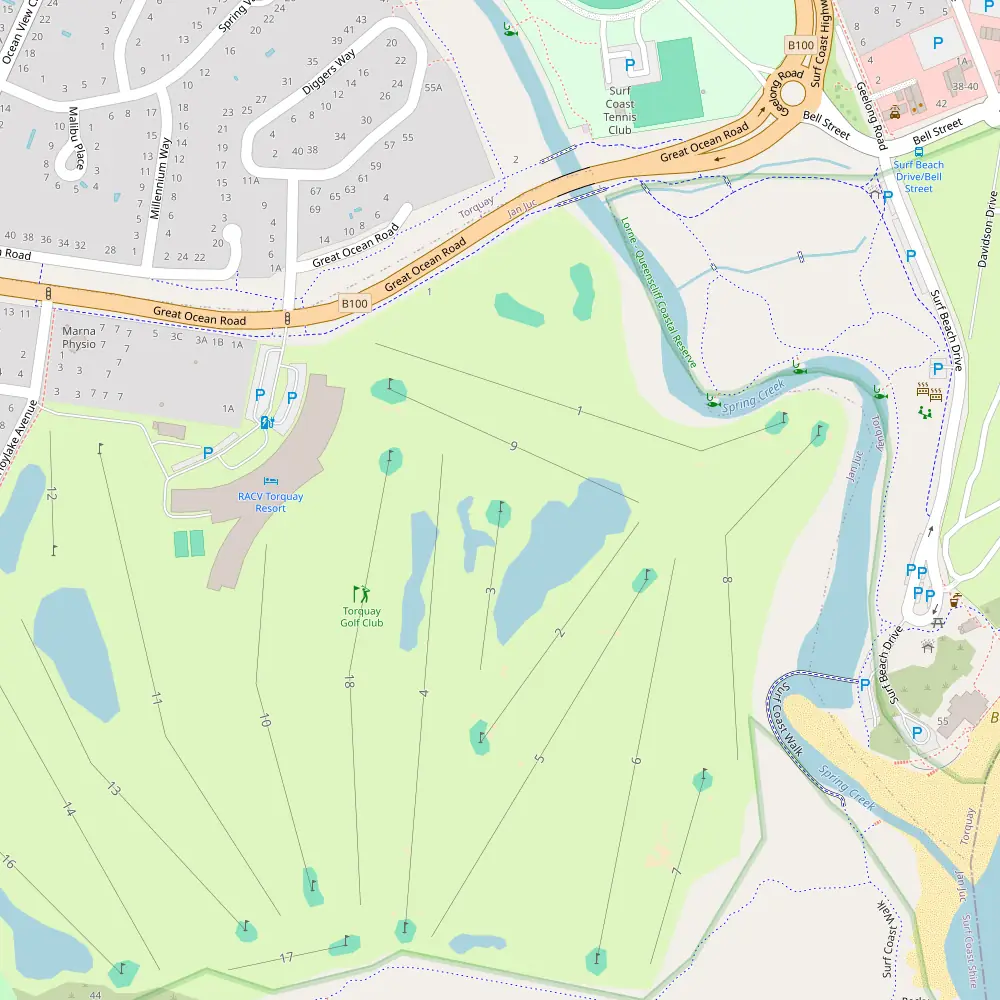
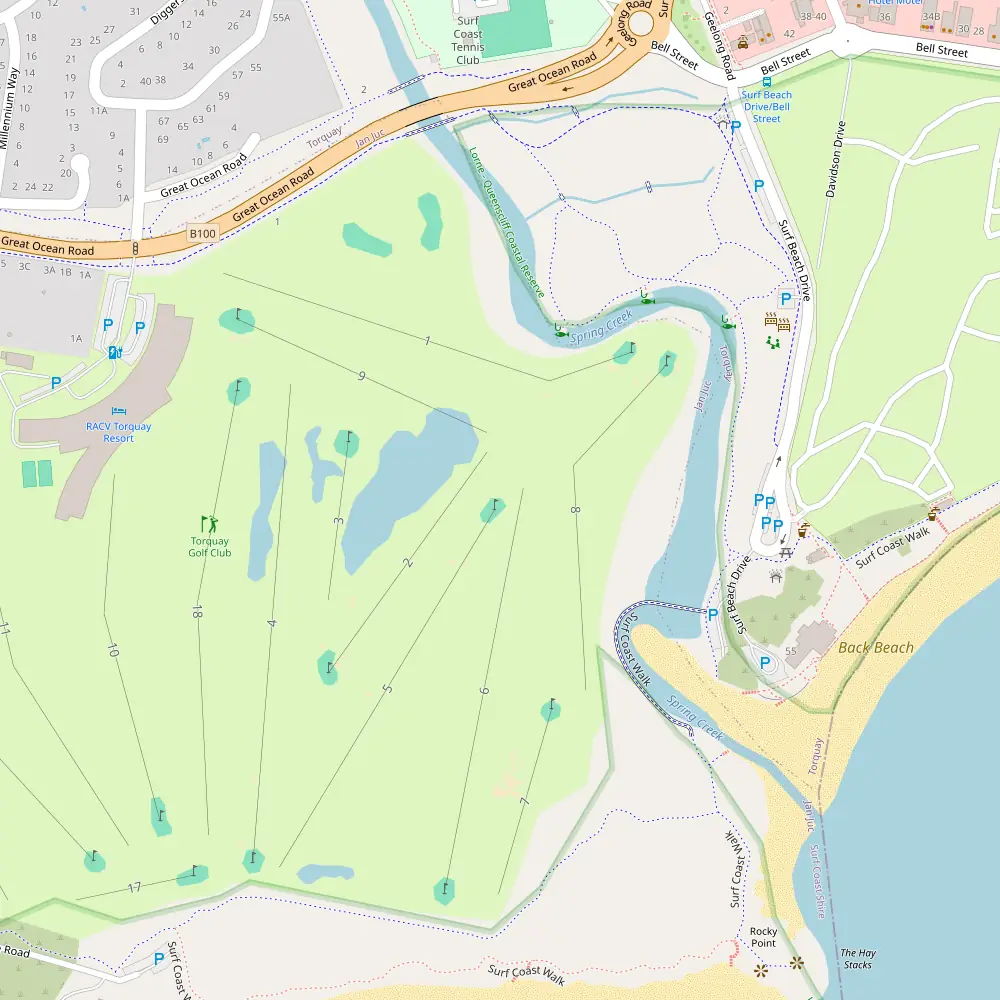
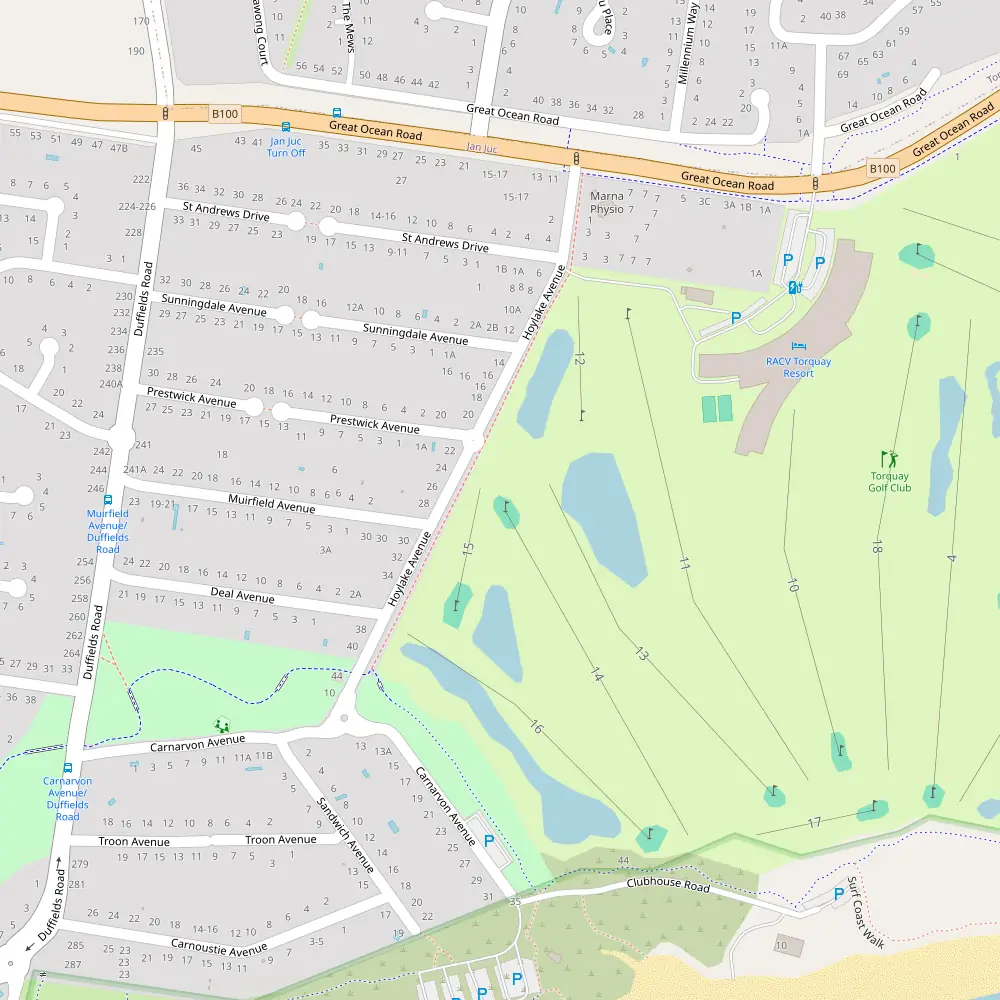
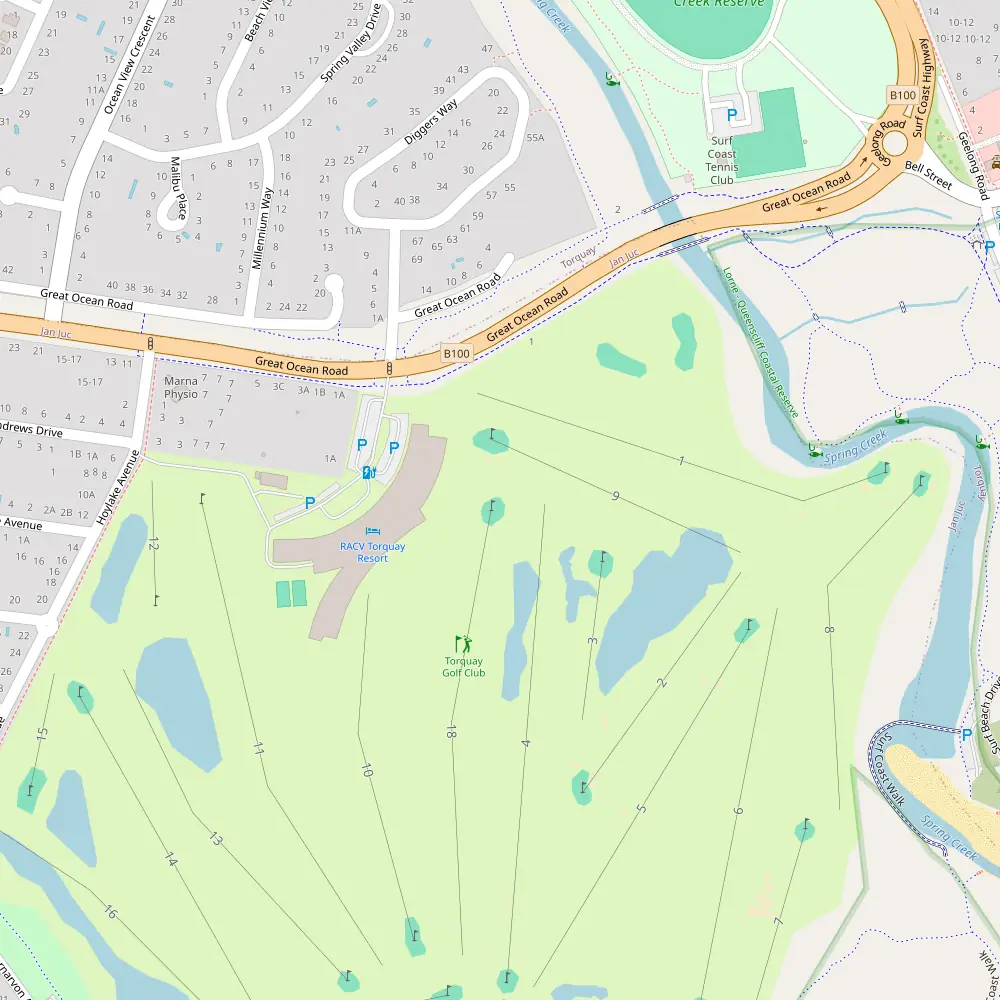
Around an hour from Melbourne CBD, the Torquay Golf Course delivers a coastal golf escape that’s as challenging as it is picturesque. Set in the scenic surrounds of Torquay, VIC, this 18-hole layout strikes a perfect balance between natural beauty and strategic play — ideal for weekend warriors and seasoned swingers alike.
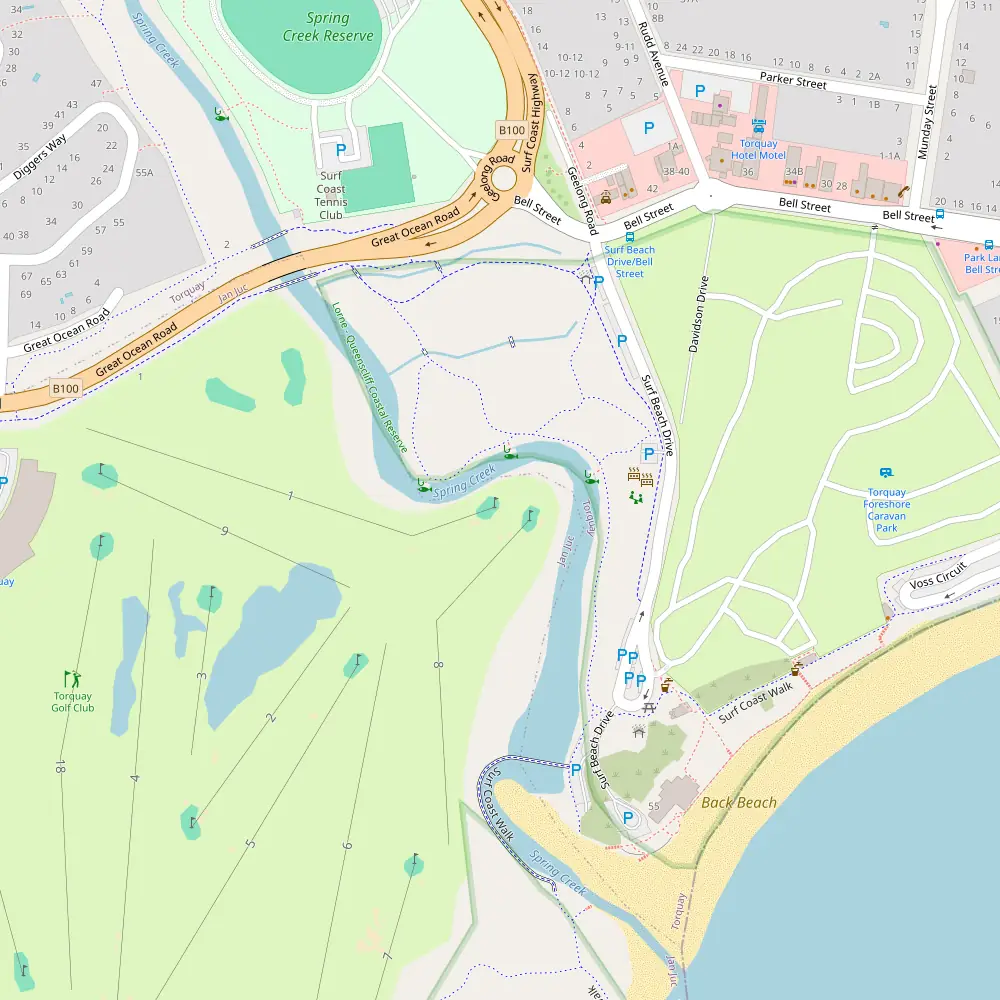
Hole 1 kicks things off with a 370m (404y) par 5 that’s more than just a warm-up. With water hazards down the left and bunkers lurking on the right, it’s a true test of strategy from the start. Sure, it looks friendly, but make no mistake — this hole wants you thinking, not just swinging.
Hole 2 keeps the pressure on. At 320m (350y), this par 4 is a real brain-teaser. With a stroke index of 13 and bunkers placed like landmines, it’s less “grip it and rip it” and more “plot your path and commit.” Playing this hole well feels like outsmarting the course — and that’s always satisfying.
Hole 3 might seem like a breather — a modest par 3 — but don’t let its simplicity fool you. It’s short, sure, but it demands pinpoint precision and a steady head. A small misjudgment here can still cost you strokes.
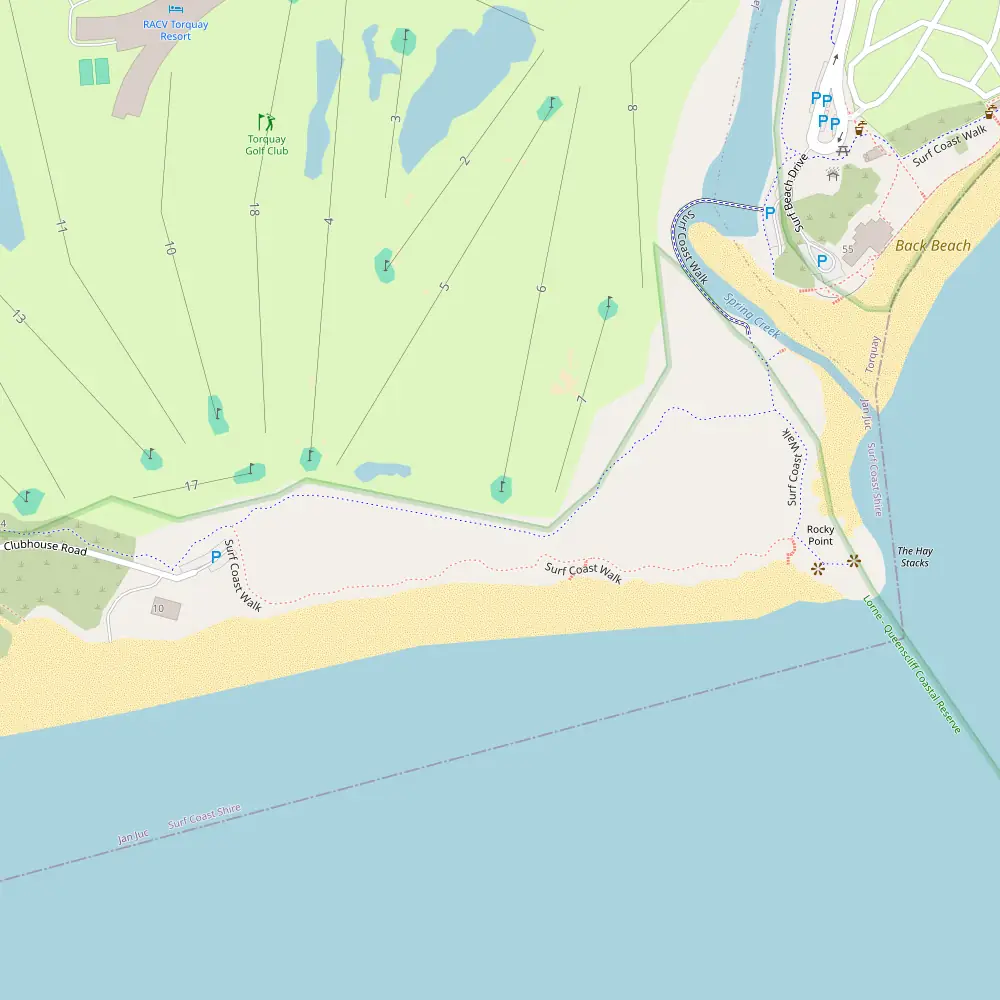
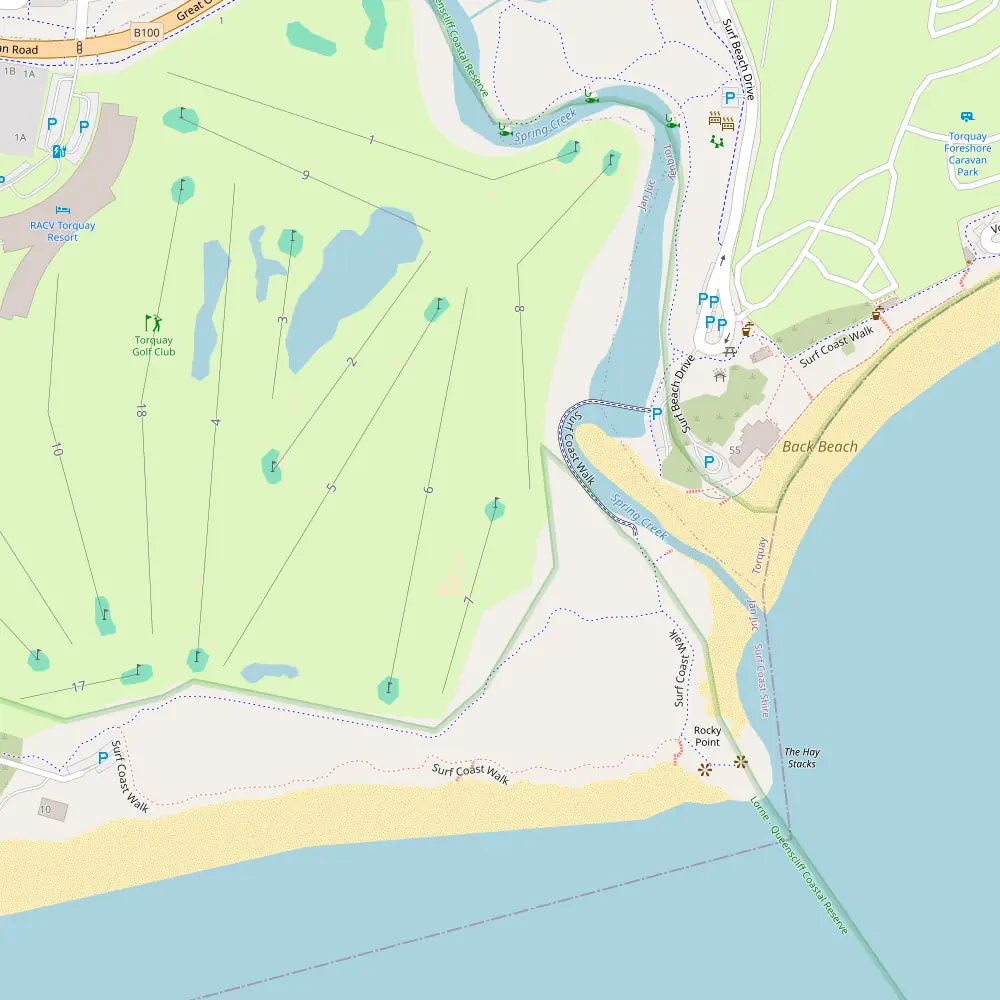
As you work your way around, the course unfolds with elevation changes, tree-lined fairways, and doglegs that challenge your club selection and course management. Each hole brings something new — whether it’s a forced carry, a tucked pin, or a sloping green that’s trickier than it looks.
Torquay mixes long, wide-open par 5s where your driver can finally stretch its legs, with tight, technical holes that force you to think two shots ahead. It’s a course that rewards patience, punishes the reckless, and keeps you coming back for another crack.
So if you’re chasing a round that blends strategy with coastal beauty, Torquay Golf Course is calling your name. Swing by, bring your A-game (and maybe a backup ball or two), and see why so many golfers call this their go-to on the Surf Coast.
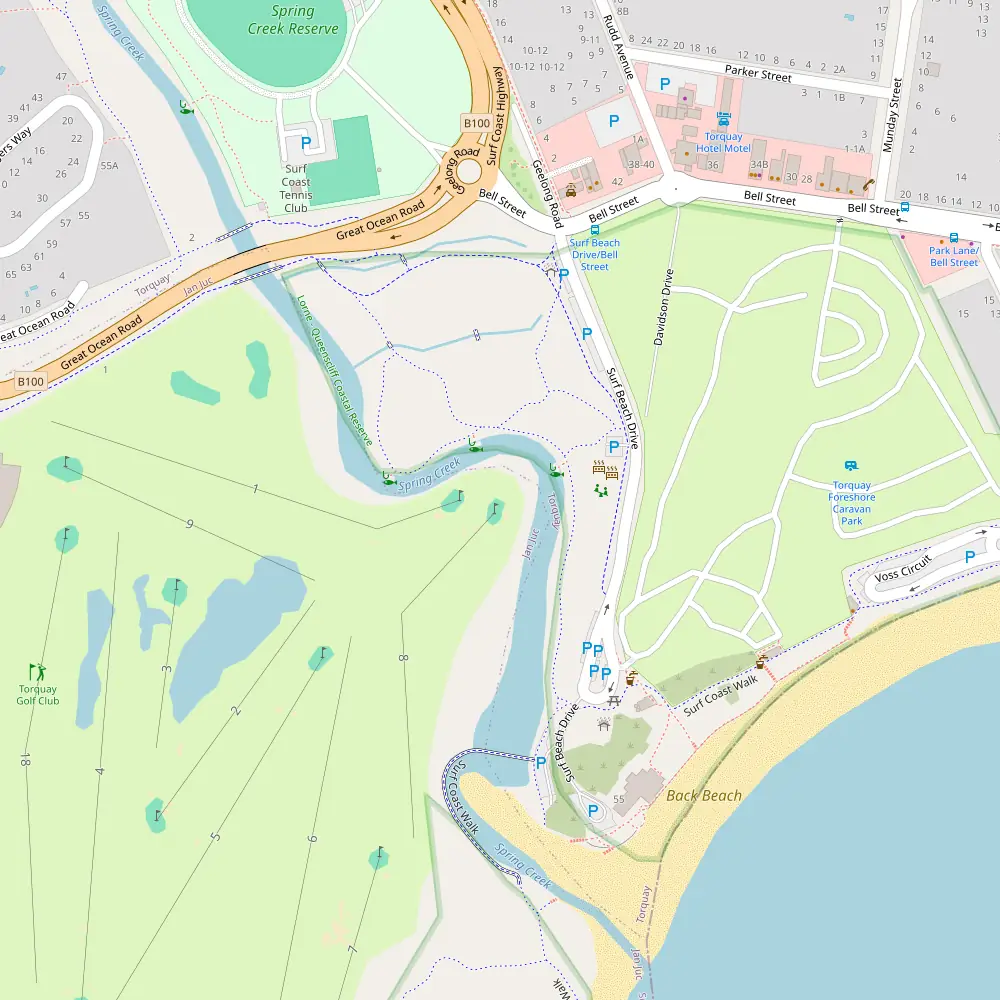
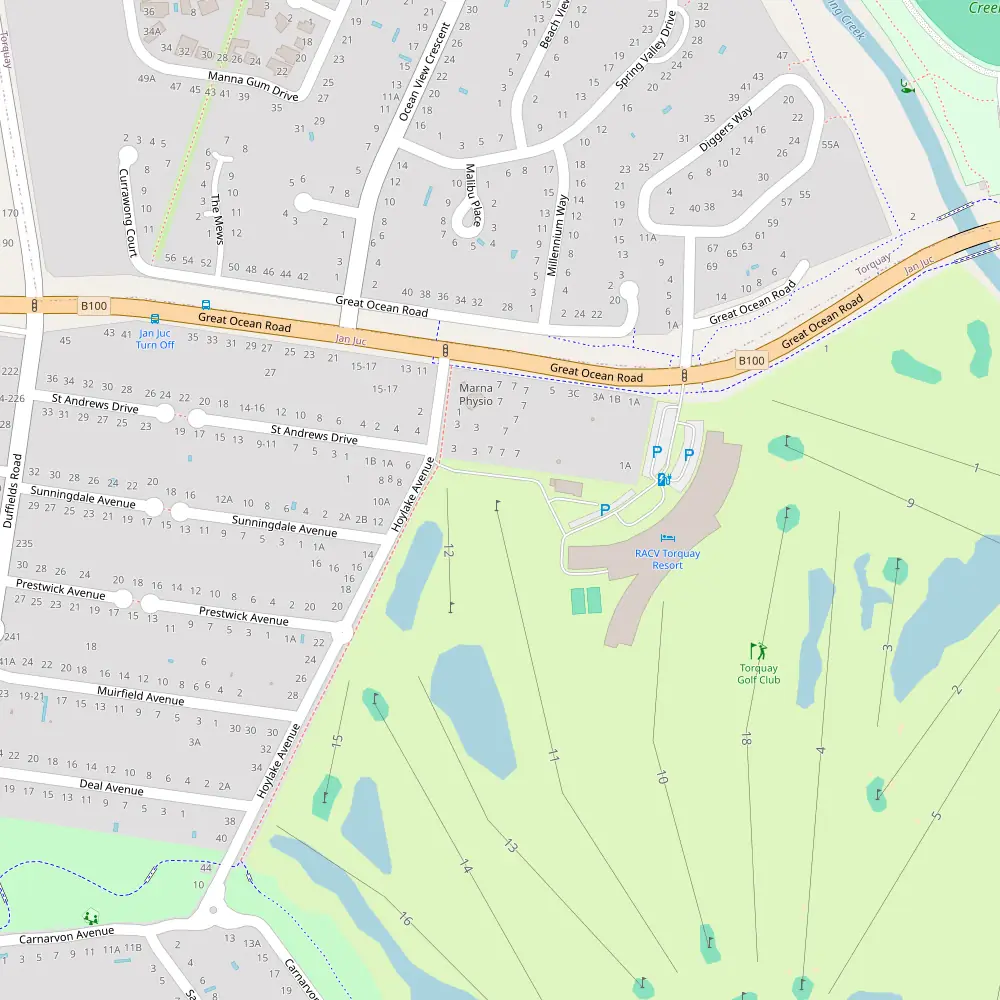
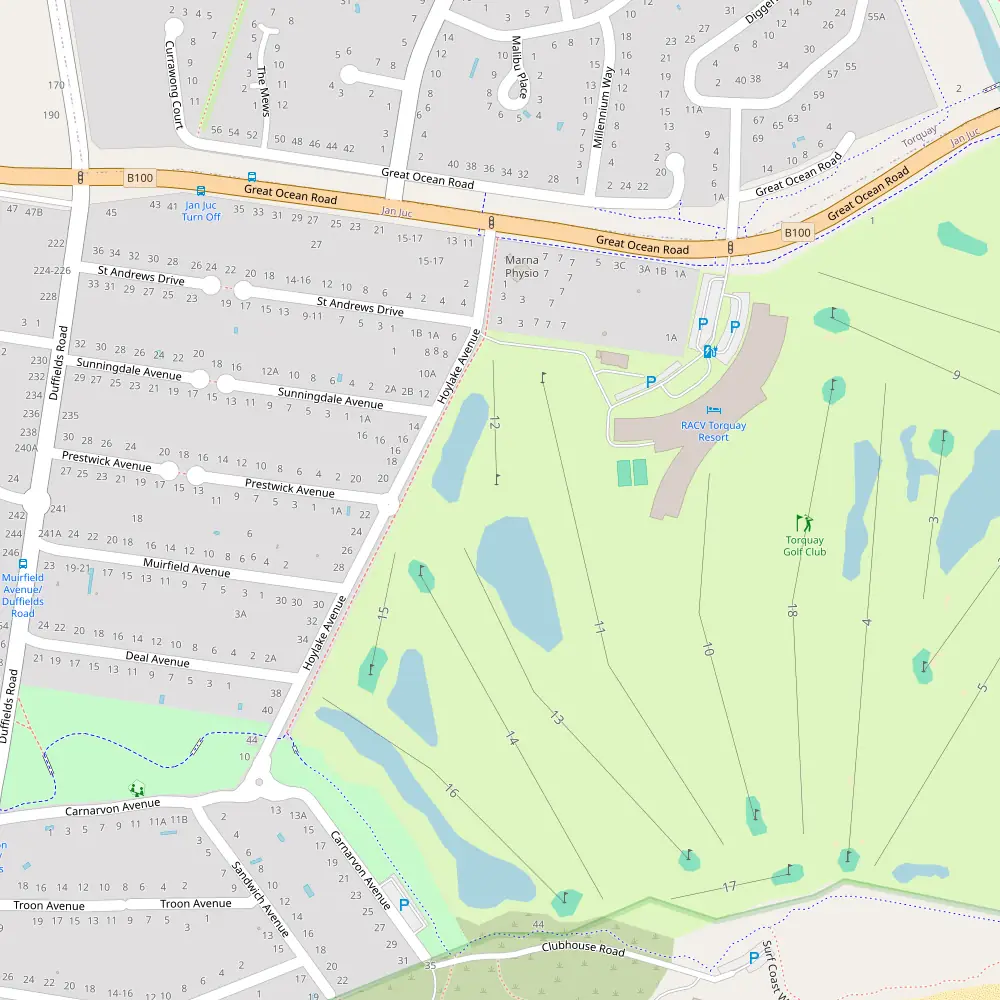
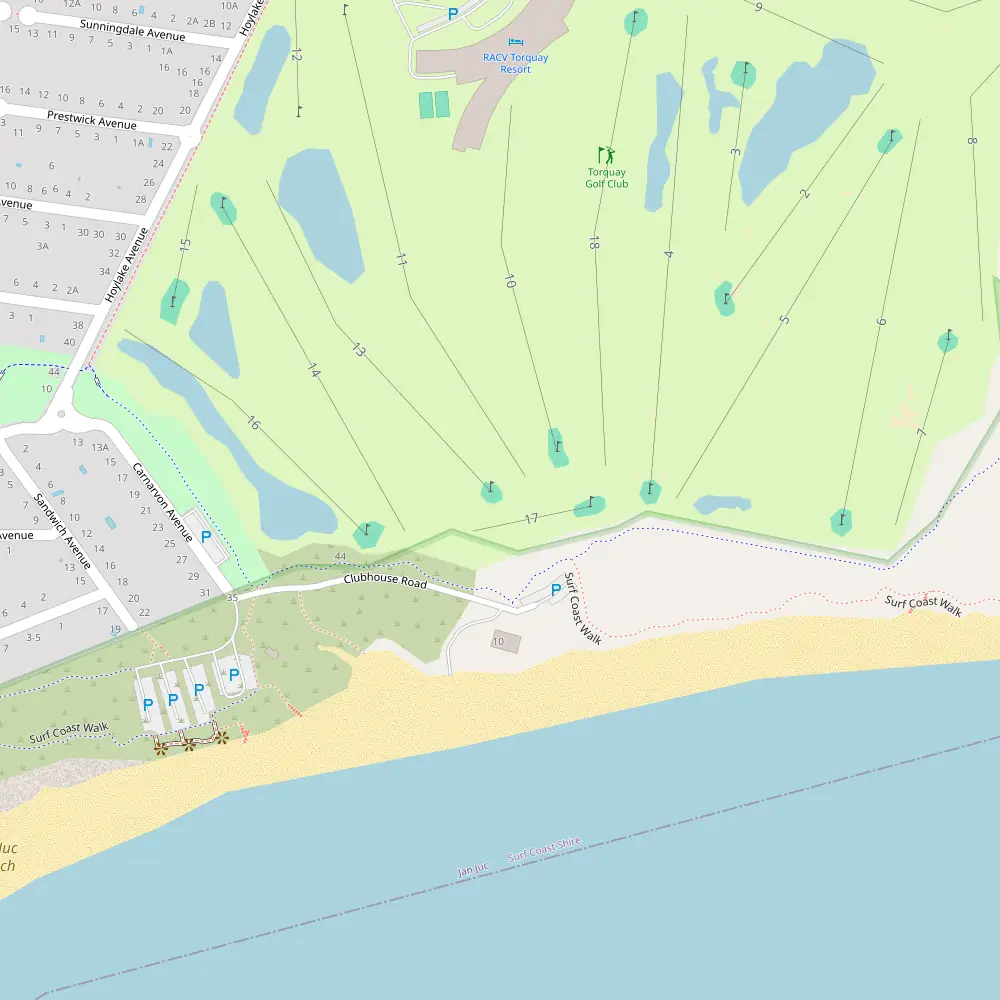
Location: 1 Great Ocean Road, Torquay, VIC, Australia
Website: http://www.torquaygolfclub.com.au
Phone: +61 (03) 5261 2005
Tee Boxes
| Tee | Yardage | Course Rating | Slope |
|---|---|---|---|
| White | 0 |
Hole by Hole Breakdown
Torquay Hole 1 – Par 5
Index: 14
Kicking off with a Par 5, Hole 1 gives you a bit of room to stretch your legs and your swing. With a Stroke Index of 14, it’s more of a gentle handshake than a firm grip, easing you into the game. This hole is a scenic beauty but don’t let the view distract you—water hazards hug the left flank, demanding a precise drive to stay dry. On the right, a quartet of bunkers (two by the green and two along the fairway) lie in wait, ready to test your sand skills. It’s a strategic dance, deciding whether to risk the drink for a shorter approach or play it safe and possibly face the sandy grips. True to its nature, the first hole sets the pace for a thoughtful round, where each shot must be weighed with care. Keep your wits about you and this opener can be a solid start to a memorable round.
Torquay Hole 2 – Par 4
Index: 13
Ah, Hole 2, a sly Par 4 that’ll test your strategic mettle right from the tee. With a stroke index of 13, it’s more of a tactician’s delight than a brute, weaving between well-placed hazards that demand both respect and precision. The fairway is flanked by a duo of bunkers on the right, lying in wait to catch any overly ambitious drives. But don’t let your guard down; the real challenge lies near the green, where a quartet of bunkers stands guard. Two on each side, these sandy sentinels are positioned to punish the errant approach and reward a well-thought-out shot. It’s a hole where playing it safe might just save your score, and getting greedy could see you beach-bound more often than a sunseeker during an Aussie summer. Play it smart, play it safe, and the green could be yours for the taking.
Torquay Hole 3 – Par 3
Index: 9
Ah, Hole 3, a tidy par 3 that may seem like a breather on the card but plays with a bit more bite than you’d expect for a stroke index of 9. The layout is straightforward with no tee length listed, suggesting a mystifying start from the get-go. There aren’t any grand features to distract you, no swirling bunkers or menacing water hazards, just the pure challenge of your own golfing prowess against the course. It’s all about precision here; a well-placed tee shot can make all the difference, turning what could be a tricky hole into a solid opportunity for par, or even a birdie if your aim is true. This hole doesn’t play favourites — it’s just you, the club, and the green. Keep it smooth and steady, and you might just walk away with a smile.
Torquay Hole 4 – Par 5

Index: 7
Taking on Hole 4, a challenging Par 5 with a stroke index of 7, you’ll find yourself strategising over every shot. This hole is a test of precision and patience, thanks to its quartet of right-sided bunkers that guard both the fairway and the green with an almost sentry-like vigilance. Each bunker seems strategically placed to catch even the slightest errant shot, making this hole a true battle of wits. While the fairway itself offers a generous landing area, the approach to the green demands accuracy to avoid a sandy fate. This hole isn’t just a walk in the park; it’s more like a high-stakes chess match where every move could land you in the beach—and not the fun kind. A solid tee shot is crucial here, setting the tone for either a triumphant birdie or a battle to save par. So, choose your weapons wisely and maybe keep the sand wedge handy!
Torquay Hole 5 – Par 4
Index: 2
Hole 5 is where the real test begins, mates. Rated a challenging par 4, with a stroke index of 2, this behemoth doesn’t skimp on the sand. Cunningly placed bunkers flank both sides of the fairway, with a couple smack dab in the centre, ready to snag anything less than your best shot. It’s a veritable minefield that requires precision from the tee and a sharp strategy to reach the green in regulation. While the tee length stands at a formidable 0m (0y), it’s the placement rather than distance that’ll test your mettle here. Navigate through this labyrinth of sand traps, and you’ll feel like you’ve earned a victory march down the fairway. Pull this off, and you’re well on your way to bragging rights at the clubhouse.
Torquay Hole 6 – Par 4
Index: 4
Ah, Hole 6, a par 4 with a stroke index of 4 that’s as tricky as a politician in question time. Detailing the challenge here, the hole is guarded by twin bunkers flanking the right side of the green, both notorious for capturing more than their fair share of golf balls—these sandy spots see more visitors than Bondi on a scorching summer day. There’s no listed tee length, a bit of a mystery that adds to the intrigue of playing this hole. The approach demands precision; overshoot and you’re beach-bound, undershoot and you’re chipping uphill. Overall, Hole 6 offers a strategic puzzle wrapped in a scenic package, where club choice and shot placement are paramount. It’s a hole where pars feel like birdies and bogeys can quickly become the norm if you’re not careful.
Torquay Hole 7 – Par 3
Index: 10
Ah, Hole 7, a sneaky little par 3 that might look benign but has a bite to it. With a stroke index of 10, it’s not the toughest on the course, but don’t let your guard down. The real mischief here lies twin green-side bunkers on the right, notorious for swallowing up anything short and right of the pin. These sandy snares see more visitors than Bondi on a hot day, so aim left if you want to avoid a sandy detour. Despite its challenges, this hole offers a breath of relief if played with a bit of nous and nerve. Strategy is key; pick the right club, focus on your swing path, and you might just walk away with a rewarding par. Just be wary of those bunkers lurking, ready to spice up your round!
Torquay Hole 8 – Par 4
Index: 1
Hole 8 is a true test of skill and strategy, earning its place as the stroke index 1 on the card. As a par 4, it might seem manageable at first glance, but don’t be fooled. The real challenge here lies in navigating the quartet of bunkers guarding the green — two on each side. These sandy hazards are strategically placed to catch even the slightest misjudgment in your approach, turning what could be a solid par into a scramble for bogey or worse. With no specific tee lengths provided, players of all skills must rely on their keen sense of distance and accuracy to make it through unscathed. Precision is key on this hole; anything less and you’ll find yourself digging more than your average treasure hunter. So, choose your clubs wisely and keep a steady hand — Hole 8 doesn’t play favourites.
Torquay Hole 9 – Par 4

Index: 15
Hole 9 at our course is a cheeky Par 4 that might seem like a breather with its Stroke Index of 15, but don’t let that fool you. This hole is peppered with challenges that demand both precision and strategy. The fairway is a minefield with twin bunkers on either side, ready to punish the slightest error off the tee. And if that wasn’t enough, there’s water smack bang in the centre that makes your approach to the green a real nail-biter. Speaking of the green, it’s guarded like a fortress with bunkers flanking either side, making your landing zone as tight as a drum. So, choose your clubs wisely and aim true, because this hole can turn from a friend to a foe in just one swing. Whether you’re laying up or going for glory, Hole 9 keeps you on your toes till the very end.
Torquay Hole 10 – Par 4

Index: 8
Ah, Hole 10, the start of the back nine and what a way to kick off the inward half! This par 4 is known among the locals for its crafty challenge, sitting snug with a stroke index of 8. Now, don’t let the absence of obvious eye-catchers fool you—no dramatic water hazards or sneaky bunkers here. Instead, it’s all about the subtleties of the layout and the strategic play this hole demands. The tee shot is crucial; you want to land it just right to set up for a clear approach. And while it might seem straightforward, the green has a few tricks up its sleeve, with subtle breaks that could mess with your putt if you’re not careful. The hole plays to a solid 0m (0y)—yes, you read that right, mate, a cheeky error in the details, but that just adds to the legend of Hole 10. So, line up, take a swing, and enjoy the game!
Torquay Hole 11 – Par 5
Index: 6
Hole 11 is a true test of strategy and skill, boasting a par 5 that keeps even the most seasoned golfers on their toes. With a stroke index of 6, it’s no walk in the park. The fairway is a minefield with twin bunkers placed smack bang in the centre, demanding precision right from the tee shot. And if that’s not enough to keep you honest, water hazards hug the left side, punishing any wayward shots that dare to flirt with the edge. This hole is a brute, asking for three well-thought-out strokes to reach the green in regulation. The layout forces golfers to make some tough decisions: play it safe and hope for a clean approach, or risk the drink for a chance at eagle. It’s the kind of hole that makes a round memorable, for better or for worse, depending on how boldly you play it.
Torquay Hole 12 – Par 3
Index: 16
Ah, Hole 12, a cheeky Par 3 that’s more about precision than power. With a stroke index of 16, it might seem like a breather, but don’t let that fool you. The layout is a fortress of sand, guarded by twin sentinels of bunkers on either side of the green—each seeing more foot traffic than a city tram. Then there’s the fairway, which isn’t spared either, flaunting a pair of bunkers smack in the centre, challenging your tee shot to be nothing short of exact. At 0 metres (0 yards), it’s all about the short game. Choose your club wisely, aim true, and maybe, just maybe, you’ll sail through unscathed. But go astray, and you’ll be grabbing your sand wedge quicker than you can say “beach day.”
Torquay Hole 13 – Par 4
Index: 5
Hole 13 is a crafty par 4, sitting snugly as the fifth hardest on the card, and it’s no walk in the park. The fairway is flanked by a pair of bunkers on each side, daring you to keep it straight or pay the sandman a visit. With the green also guarded by two bunkers on the right, precision on your approach is more valuable than a cold one at the end of a long day. The layout pushes you to really think about your tee shot — play it too safe and you’re left with a longer, more daunting second shot to a well-protected green. This hole doesn’t just test your swing; it’s a mental puzzle, making it a standout challenge that can make or break your back nine. So, choose your clubs wisely and keep your wits about you!
Torquay Hole 14 – Par 4
Index: 3
Hole 14 is where the real test kicks in, mate. This par-4 beauty is tricked out with a stroke index of 3, making it one of the most challenging on the course. The fairway’s littered with bunkers on both sides—double trouble on the left and equally menacing on the right, so your tee shot needs the precision of a surgeon. If that wasn’t enough to get your knees knocking, there’s water hugging the left side, ready to swallow any wayward shots. Strategy here is king; play it too safe and the bunkers will mock you, get too cheeky and the water will claim your ball. It’s a hole that sees more strategy changes than a chess match at the park. Whether you conquer it or it humbles you, Hole 14 remains a memorable part of the round, demanding respect and a solid game plan.
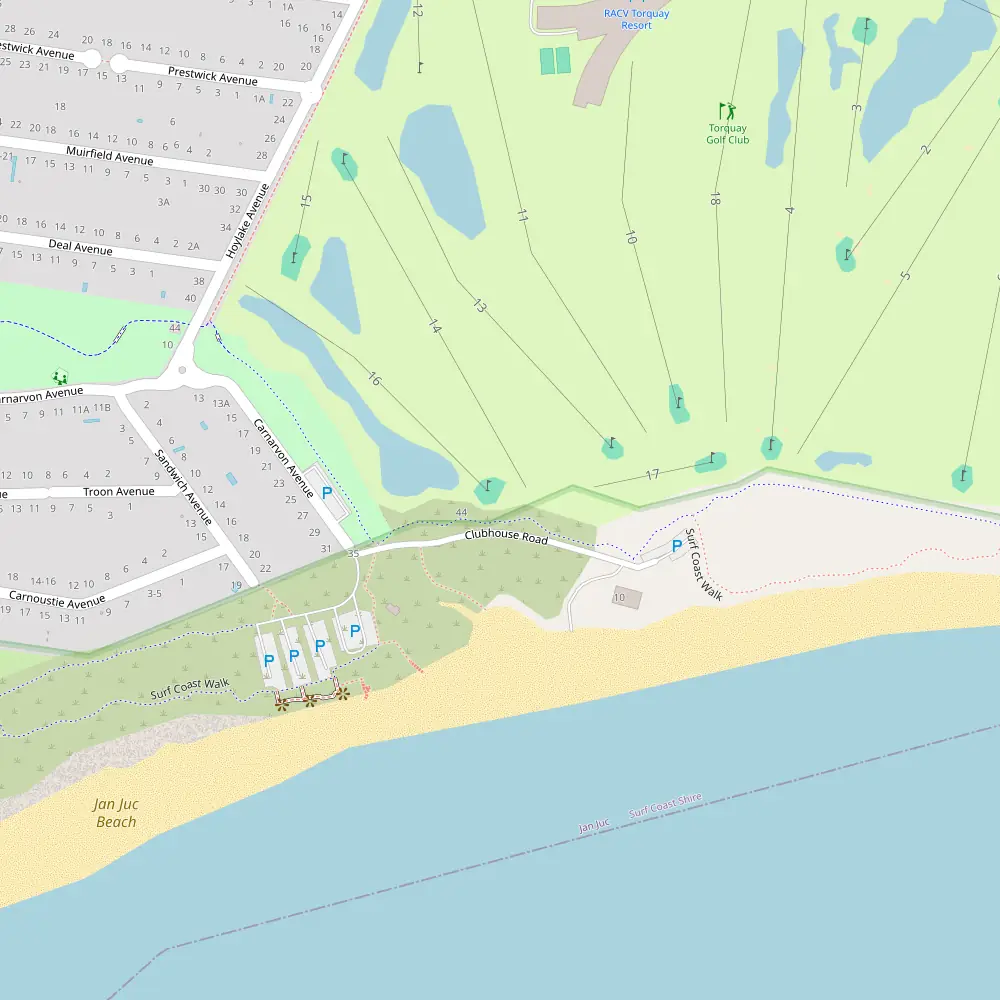
Torquay Hole 15 – Par 3
Index: 18
Ah, Hole 15, the cheeky little par 3 that’s as relaxing as a Sunday arvo BBQ. With a stroke index of 18, it’s the easiest on the card, but don’t let that fool you into complacency. Guarded by twin bunkers on the left, this green can be as tricky as a crossword if the pin’s tucked away. You’ll need a precise tee shot to avoid a sandy holiday, as these bunkers see more action than a snag at a footy match. It’s a short dance but one that requires you to stay on your toes. Ideal for a bit of a breather before the final stretch, yet it keeps you alert enough to stay in the game. So, steady your nerves, pick your club, and let it fly—this hole might just be the breather you need but underestimate it at your peril!
Torquay Hole 16 – Par 4
Index: 11
Hole 16 is a crafty par 4, a true test of precision and nerve with a stroke index of 11. As you stand on the tee, you’ll notice the strategic placement of twin bunkers flanking either side of the green, eager to punish the overly ambitious. To add a splash of drama, water hazards guard the right, demanding a calculated approach. This hole doesn’t just play with your skill but also toys with your mind. The fairway, while inviting, is a tightrope walk with the lurking dangers ready to claim any wayward shots. A strong tee shot avoiding the drink sets up a pivotal second shot, where club selection and nerve control are paramount to securing par. Here, it’s not just about how well you hit but how smart you play. So, lace up, line up, and let fly—Hole 16 waits to test the mettle of every golfer.
Torquay Hole 17 – Par 3
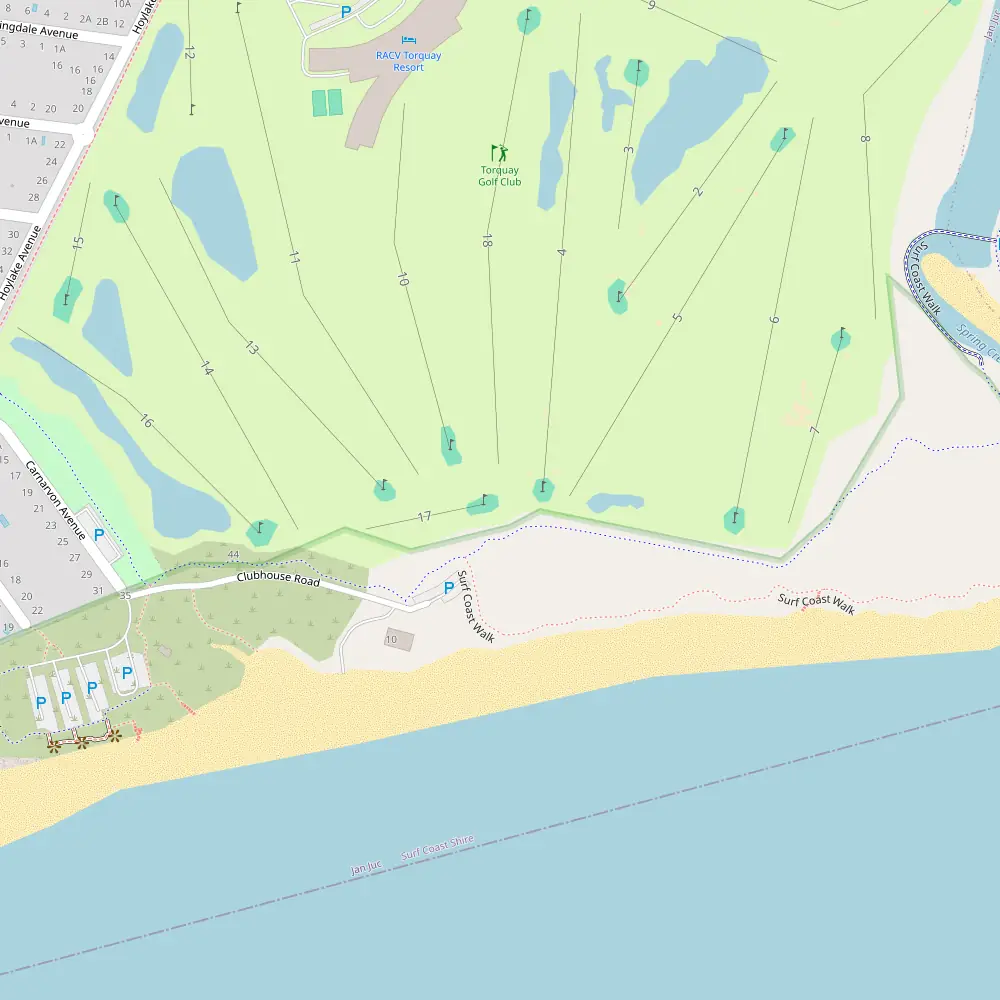
Index: 17
Hole 17 might seem like a stroll in the park with its Par 3, but don’t let the Stroke Index of 17 fool you into complacency. What this hole lacks in length, it makes up for in its cunning arrangement of hazards. Flanked by a quartet of bunkers, two on each side, it’s like navigating a sandy gauntlet. These aren’t your average sand traps either; they’re strategically placed to catch any wayward shots, making precision the name of the game here. Whether you’re trying to save par or sneak in a birdie, getting the ball to stick on this green demands a tee shot as precise as a surgeon’s scalpel. So, grab your club and take aim—this hole is a true test of your short game prowess. Just remember, those bunkers see more footprints than a beach on a hot day!
Torquay Hole 18 – Par 5
Index: 12
As you step up to the tee on the 18th, a par 5 that’s as challenging as it is charming, you’ll notice it’s guarded like a fortress with an array of strategically placed bunkers. With a stroke index of 12, this hole demands respect and a thoughtful approach. The fairway is a minefield of bunkers on every side—left, centre, and right—requiring precision off the tee and solid strategy to navigate successfully. Approaching the green, your troubles aren’t over yet. The green itself is flanked by two central bunkers and another pair to the right, ready to punish any wayward approaches. This closing hole is no walk in the park but offers a final test of your skill and nerve. It’s the kind of hole that keeps the conversation lively back at the clubhouse, as tales of triumphs and tragedies unfold.
Course Stats Summary
- Holes: 18
- Total Par: 71